


View Events Calendar
Learn how to use the events calendar (monthly, weekly, or daily) to view all admission requests, tours, forms, and leads.
Overview
The Events Calendar is the visual home of your admissions activity. Every tour booked by a parent shows up here automatically, alongside other school events, so the admin can see the day, week, or month at a glance.
Use the calendar to:
- See all upcoming tour bookings in a time-grid view.
- Open a booking to see the full tour details (description, date/time, school, parents, location).
- Reschedule or cancel a tour directly from the calendar — the parent is notified automatically.
- Navigate between days, weeks, and months to plan ahead.
The Events Calendar is read-and-manage only — you create tours from the Tours & Forms tab. New tour bookings appear here as soon as a parent books a slot.
How to Access the Events Calendar
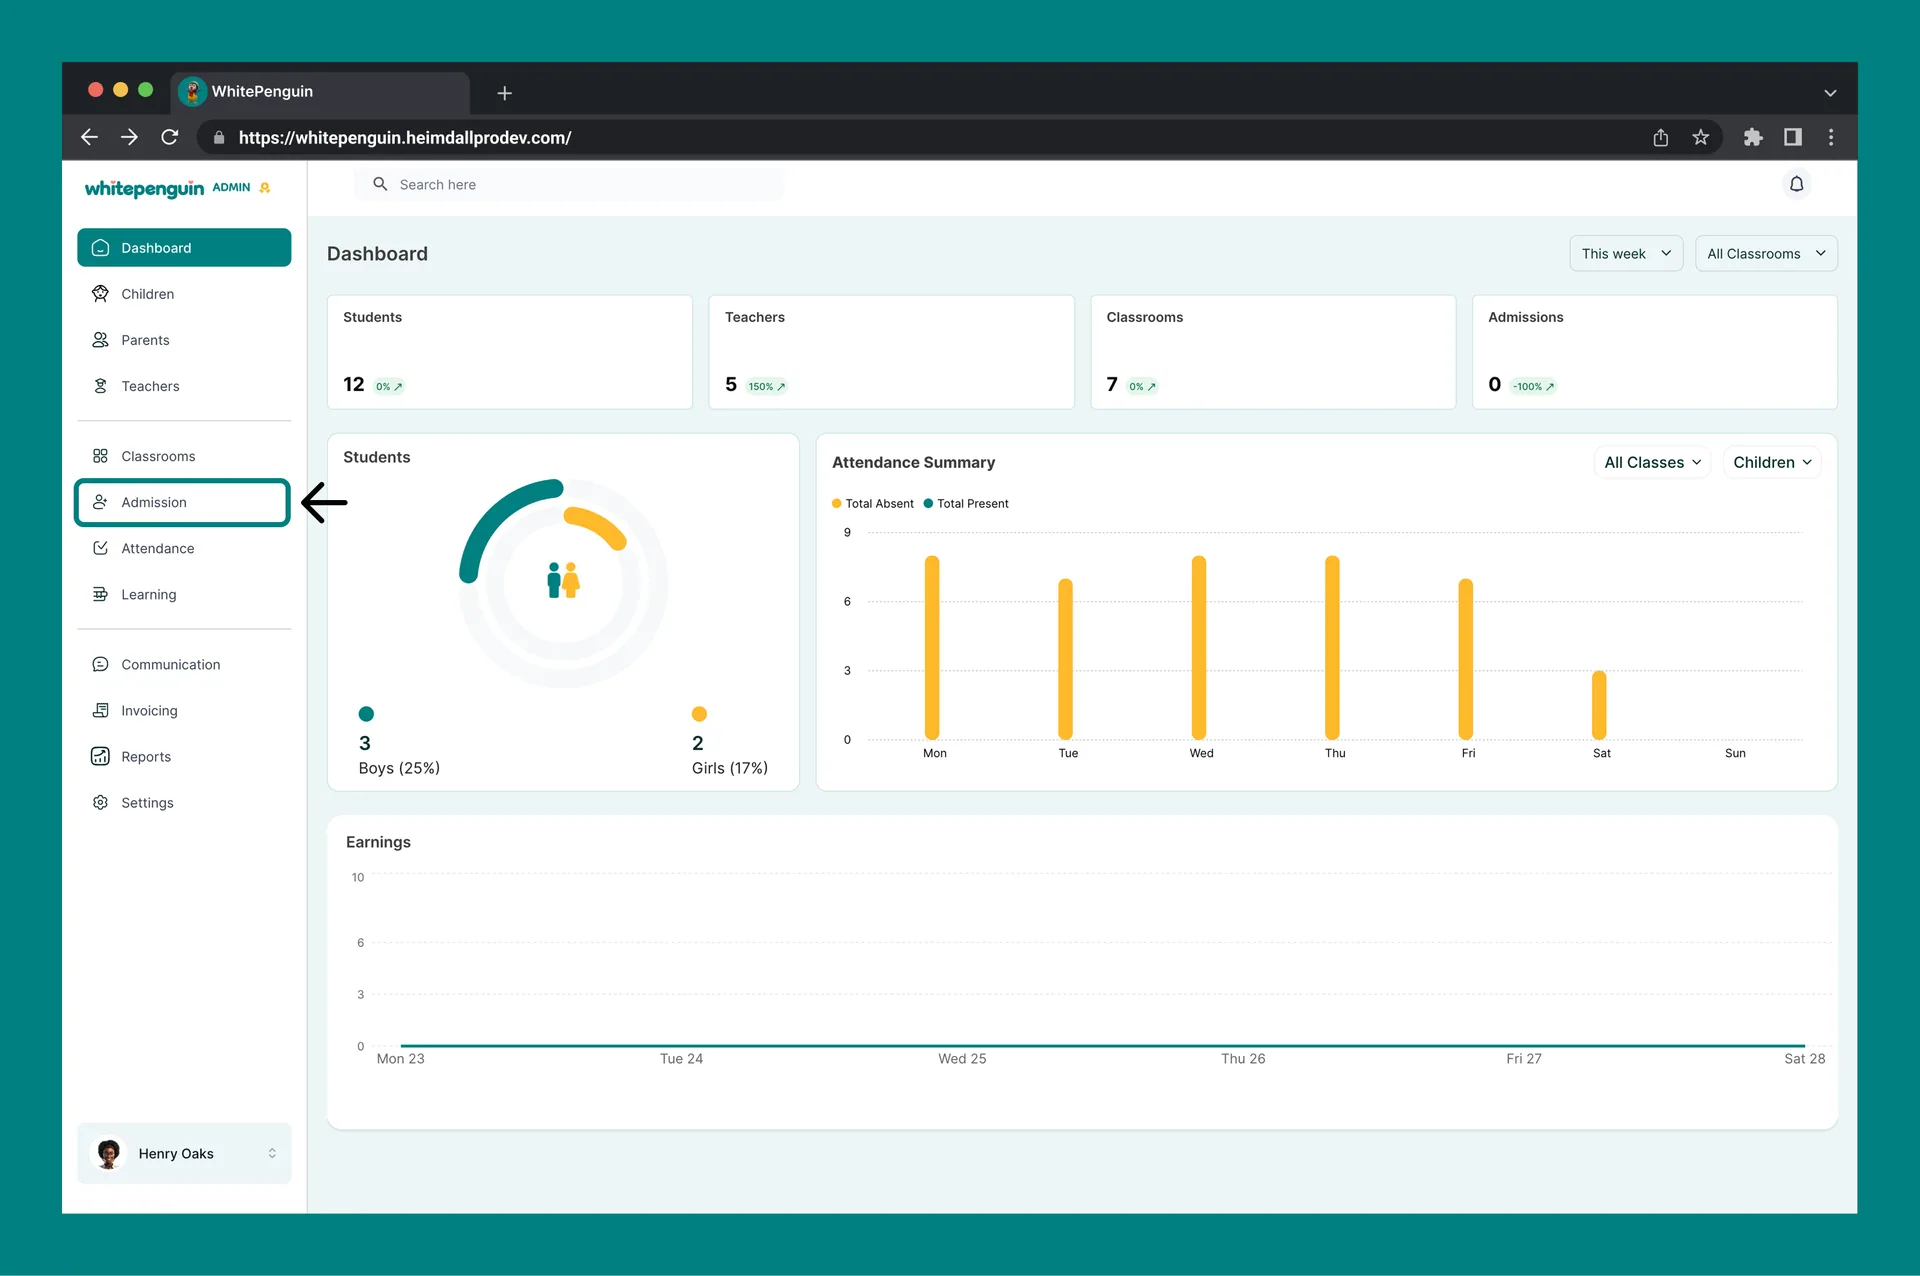
- Click Admission in the left sidebar.
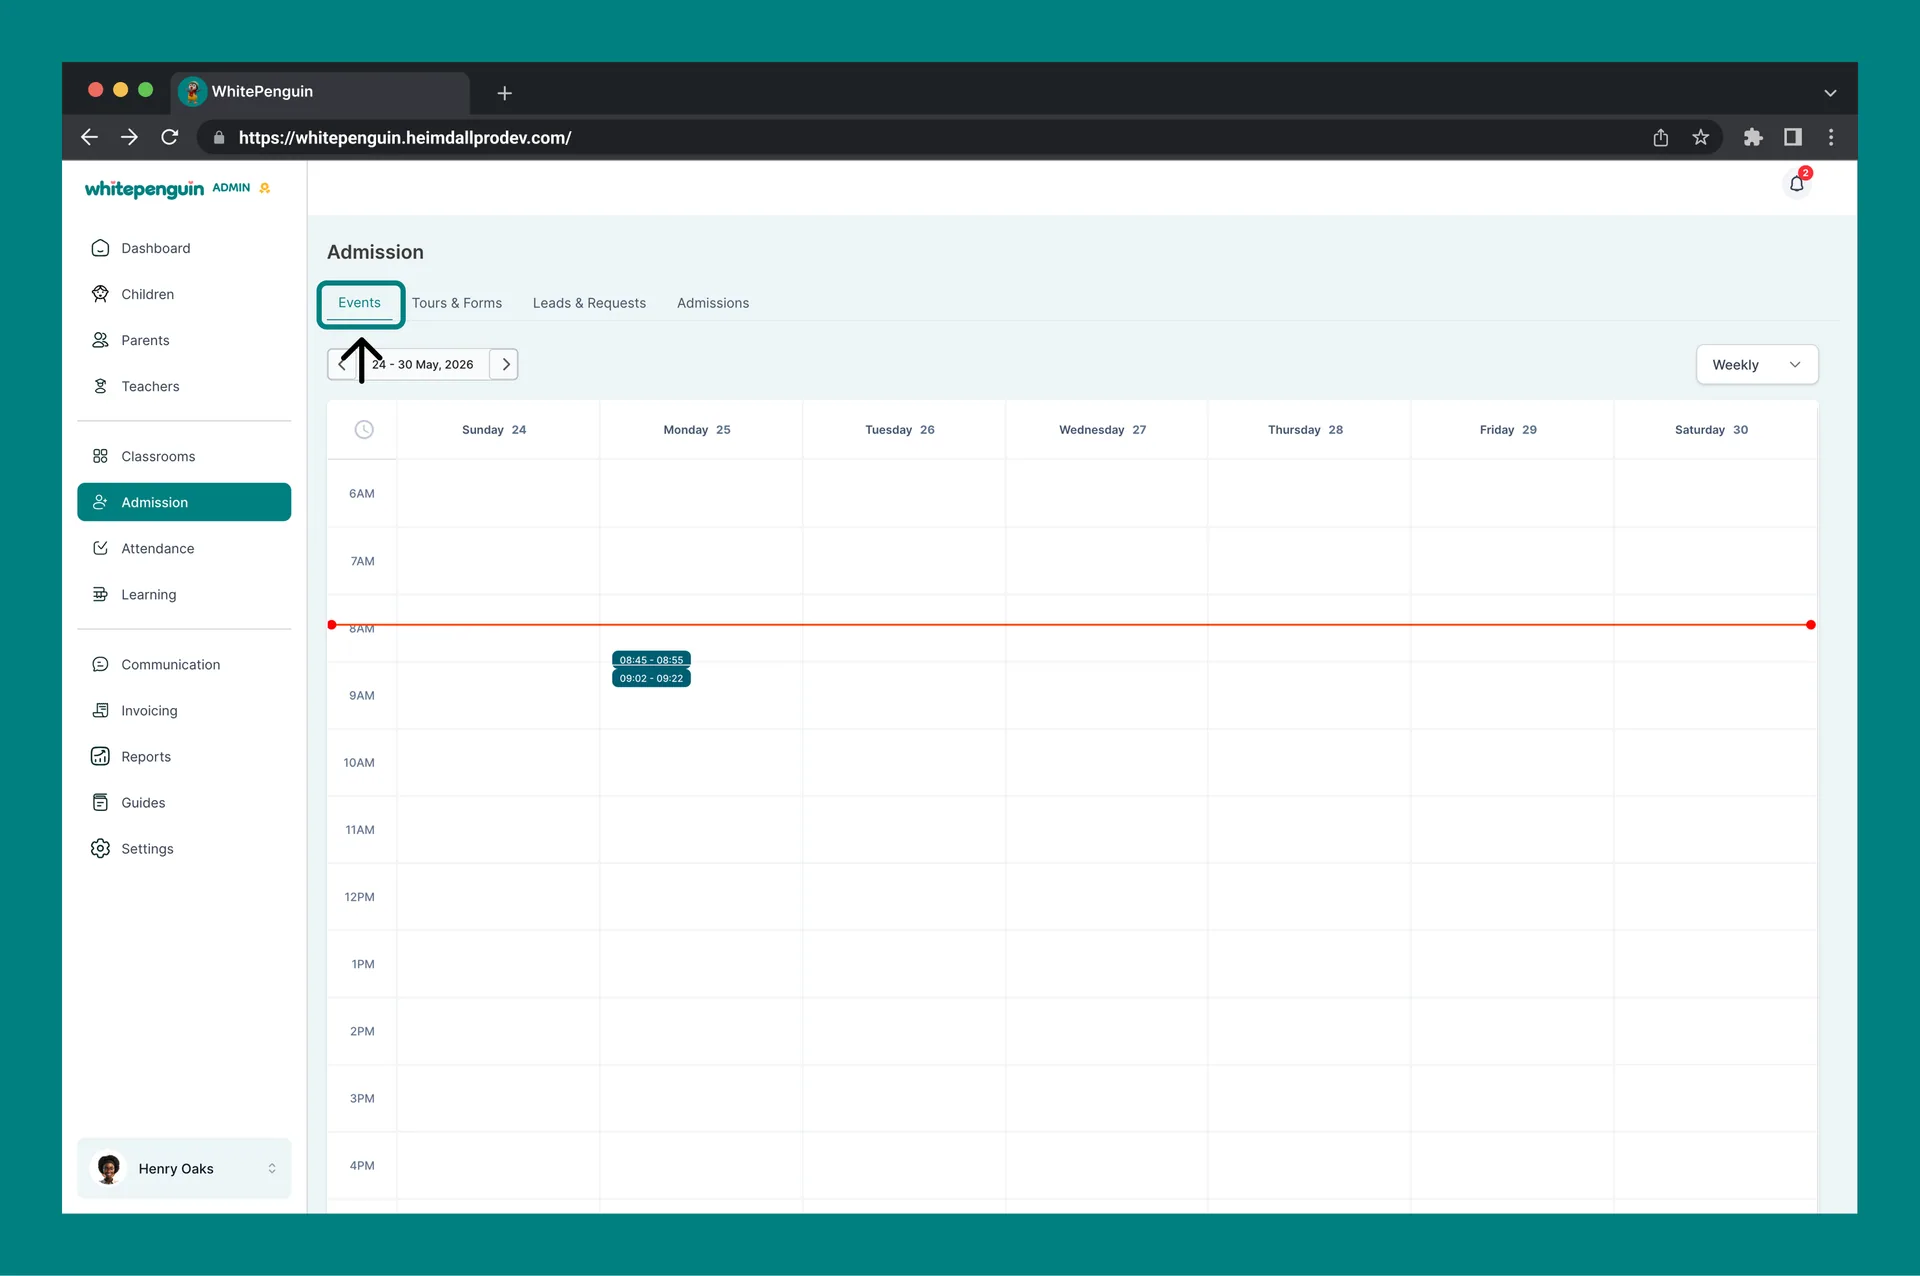
- The Events tab is selected by default. (If not, click Events at the top of the Admission page.)
- The calendar opens in Weekly view showing the current week.
- Use the date range navigator (top left) and the view dropdown (top right) to change what you see.
Calendar Layout — What You See
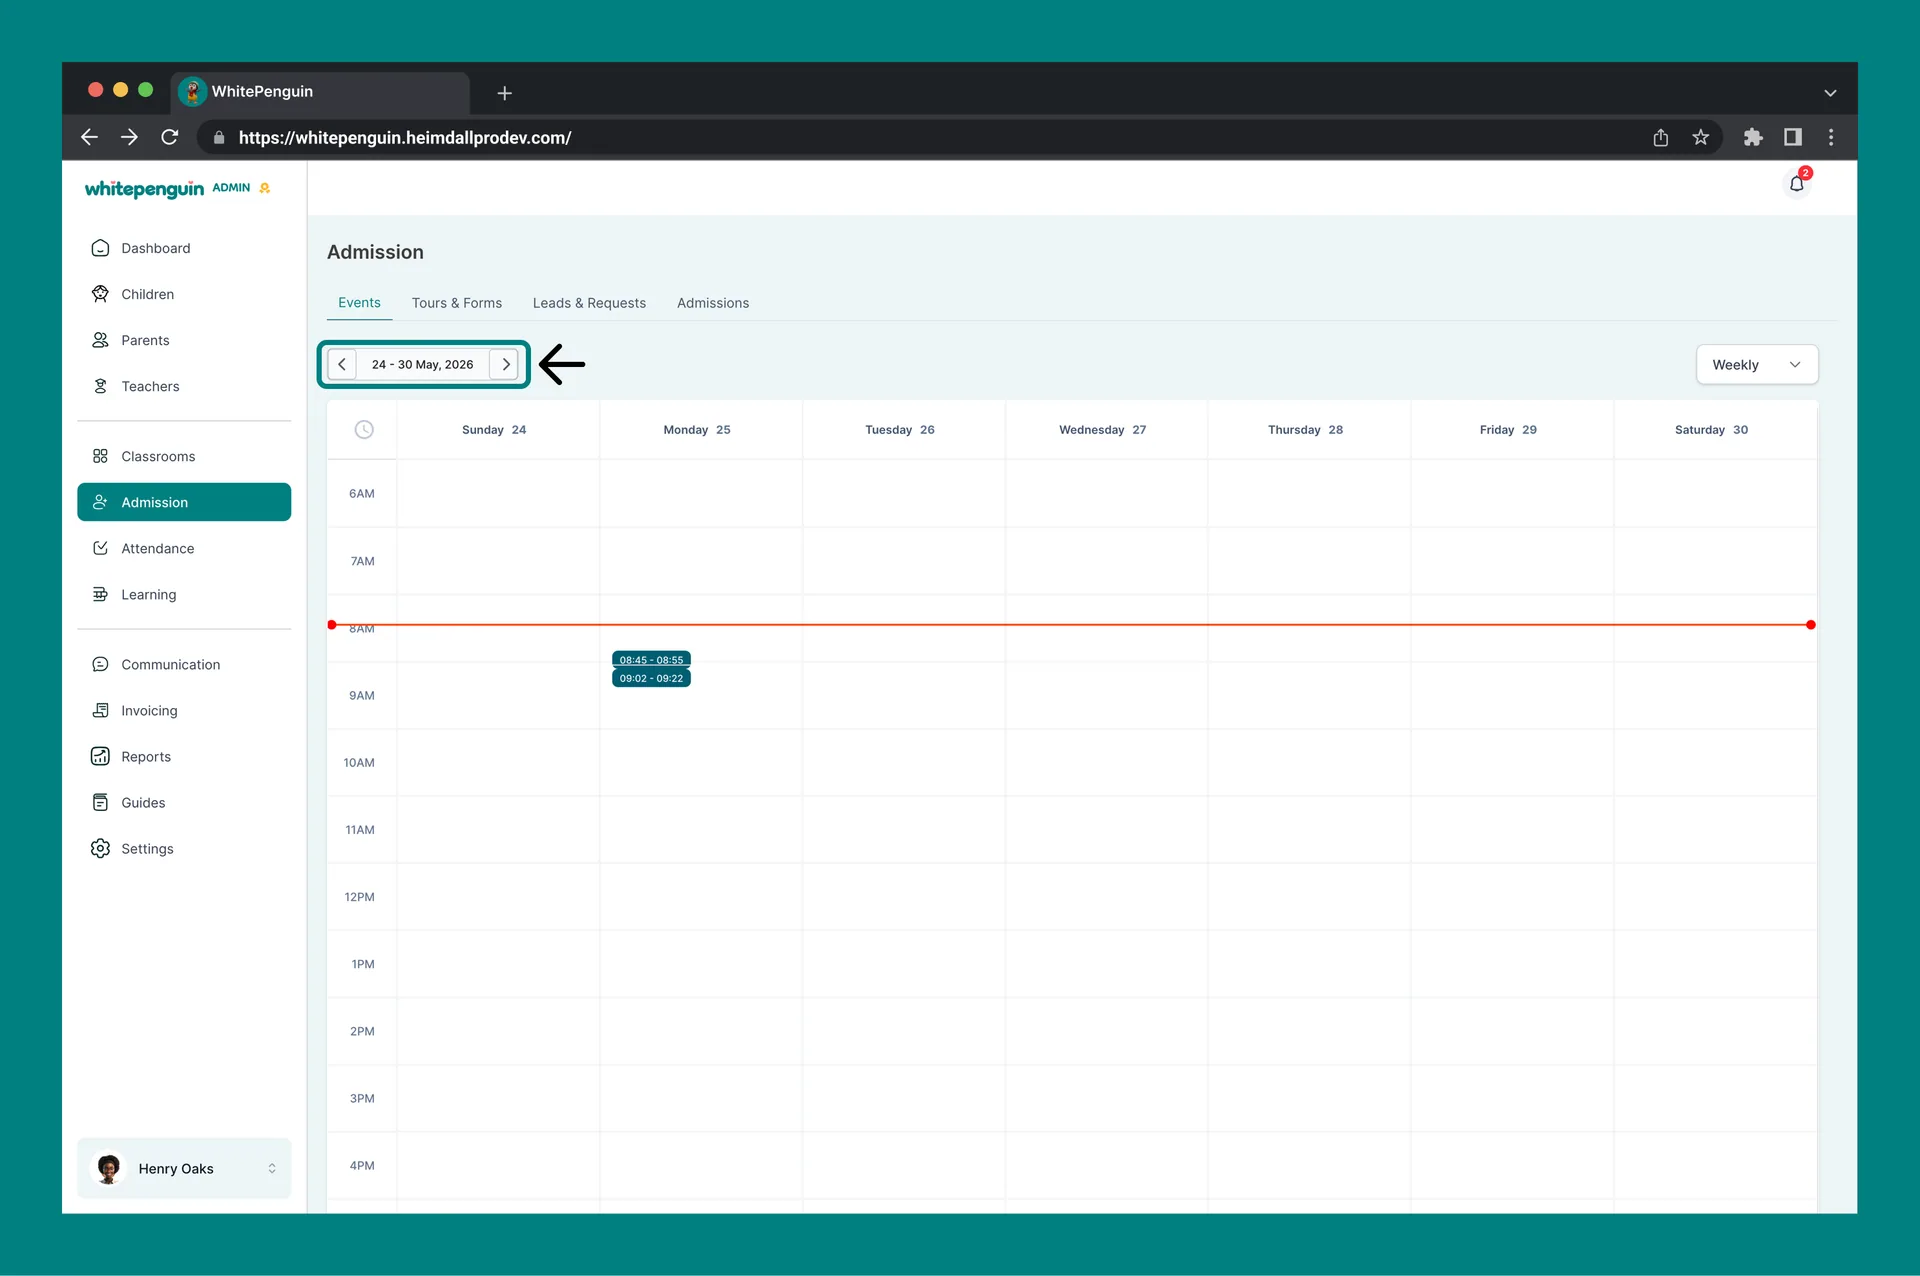
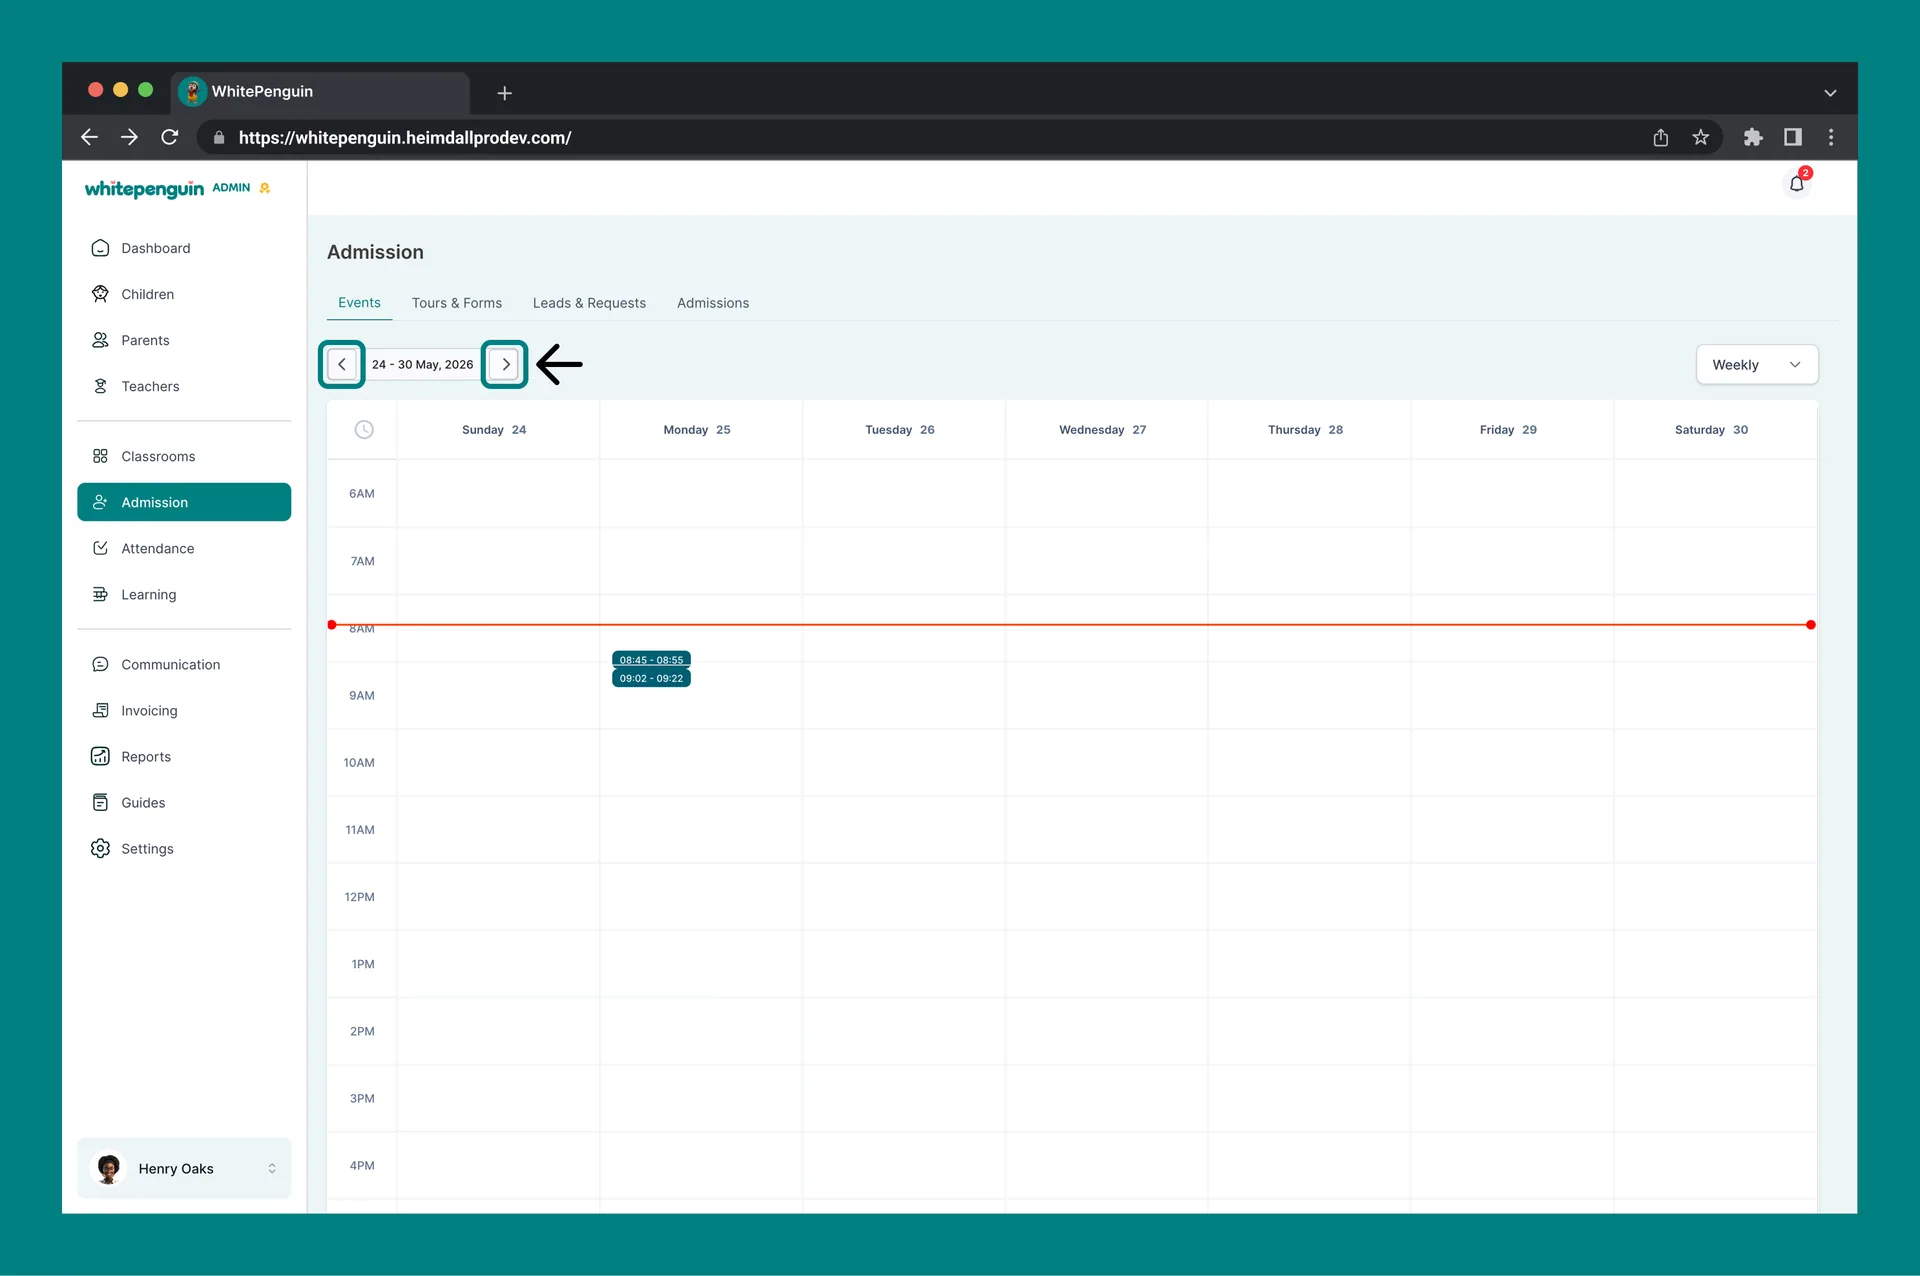
1. Date Range Navigator (top left)
- The current date range is shown in the center (e.g. 24 – 30 May, 2026).
- Use the ‹ and › arrows to move backward or forward by one period (day, week, or month, depending on your view).
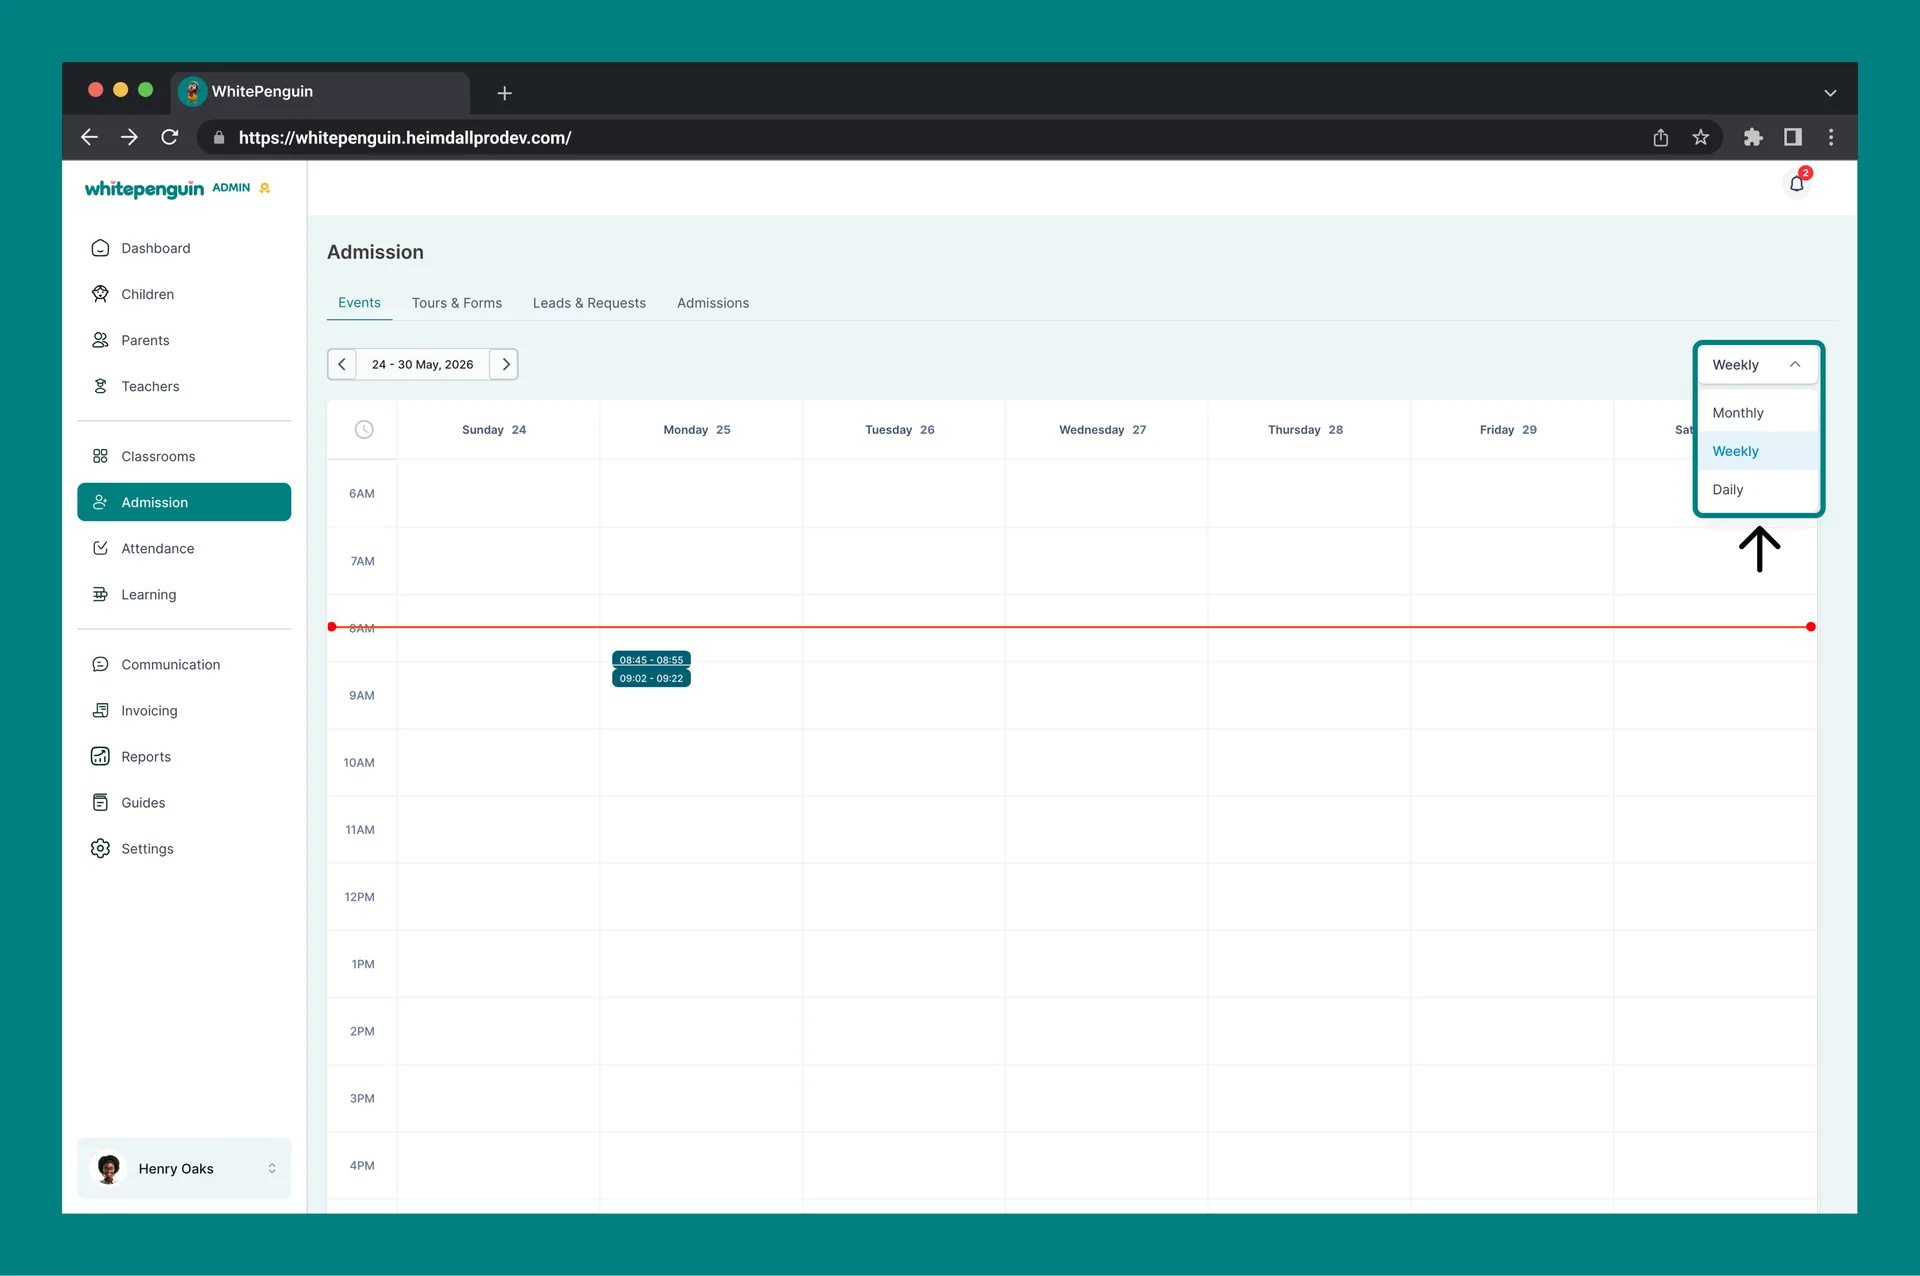
2. View Switcher (top right)
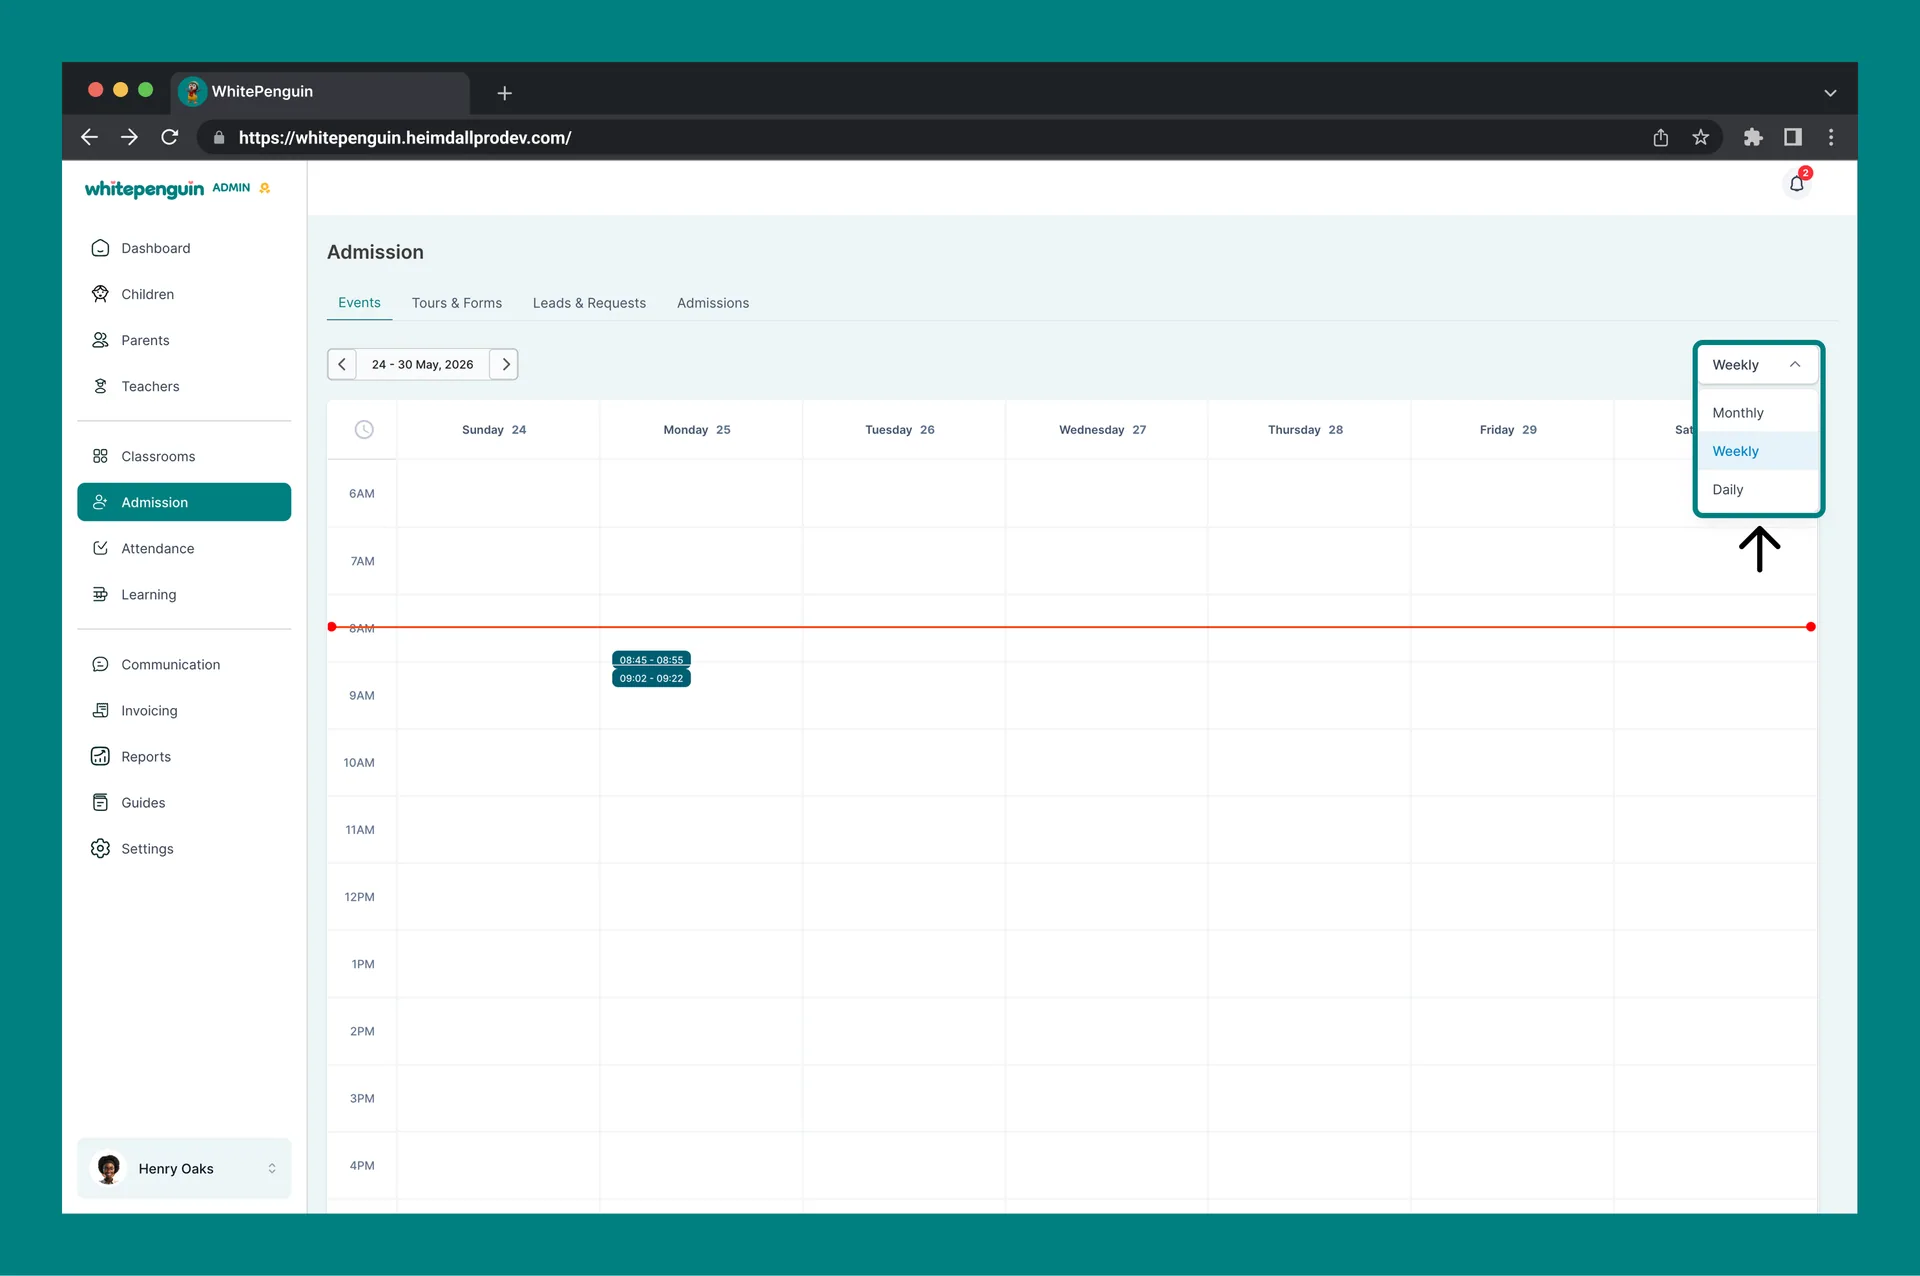
Click the dropdown to switch between:
- Daily — a single day, hour by hour.
- Weekly (default) — seven columns (Sunday – Saturday) with a time grid from 6 AM to 11 PM.
- Monthly — a full month overview with all events listed on their days.
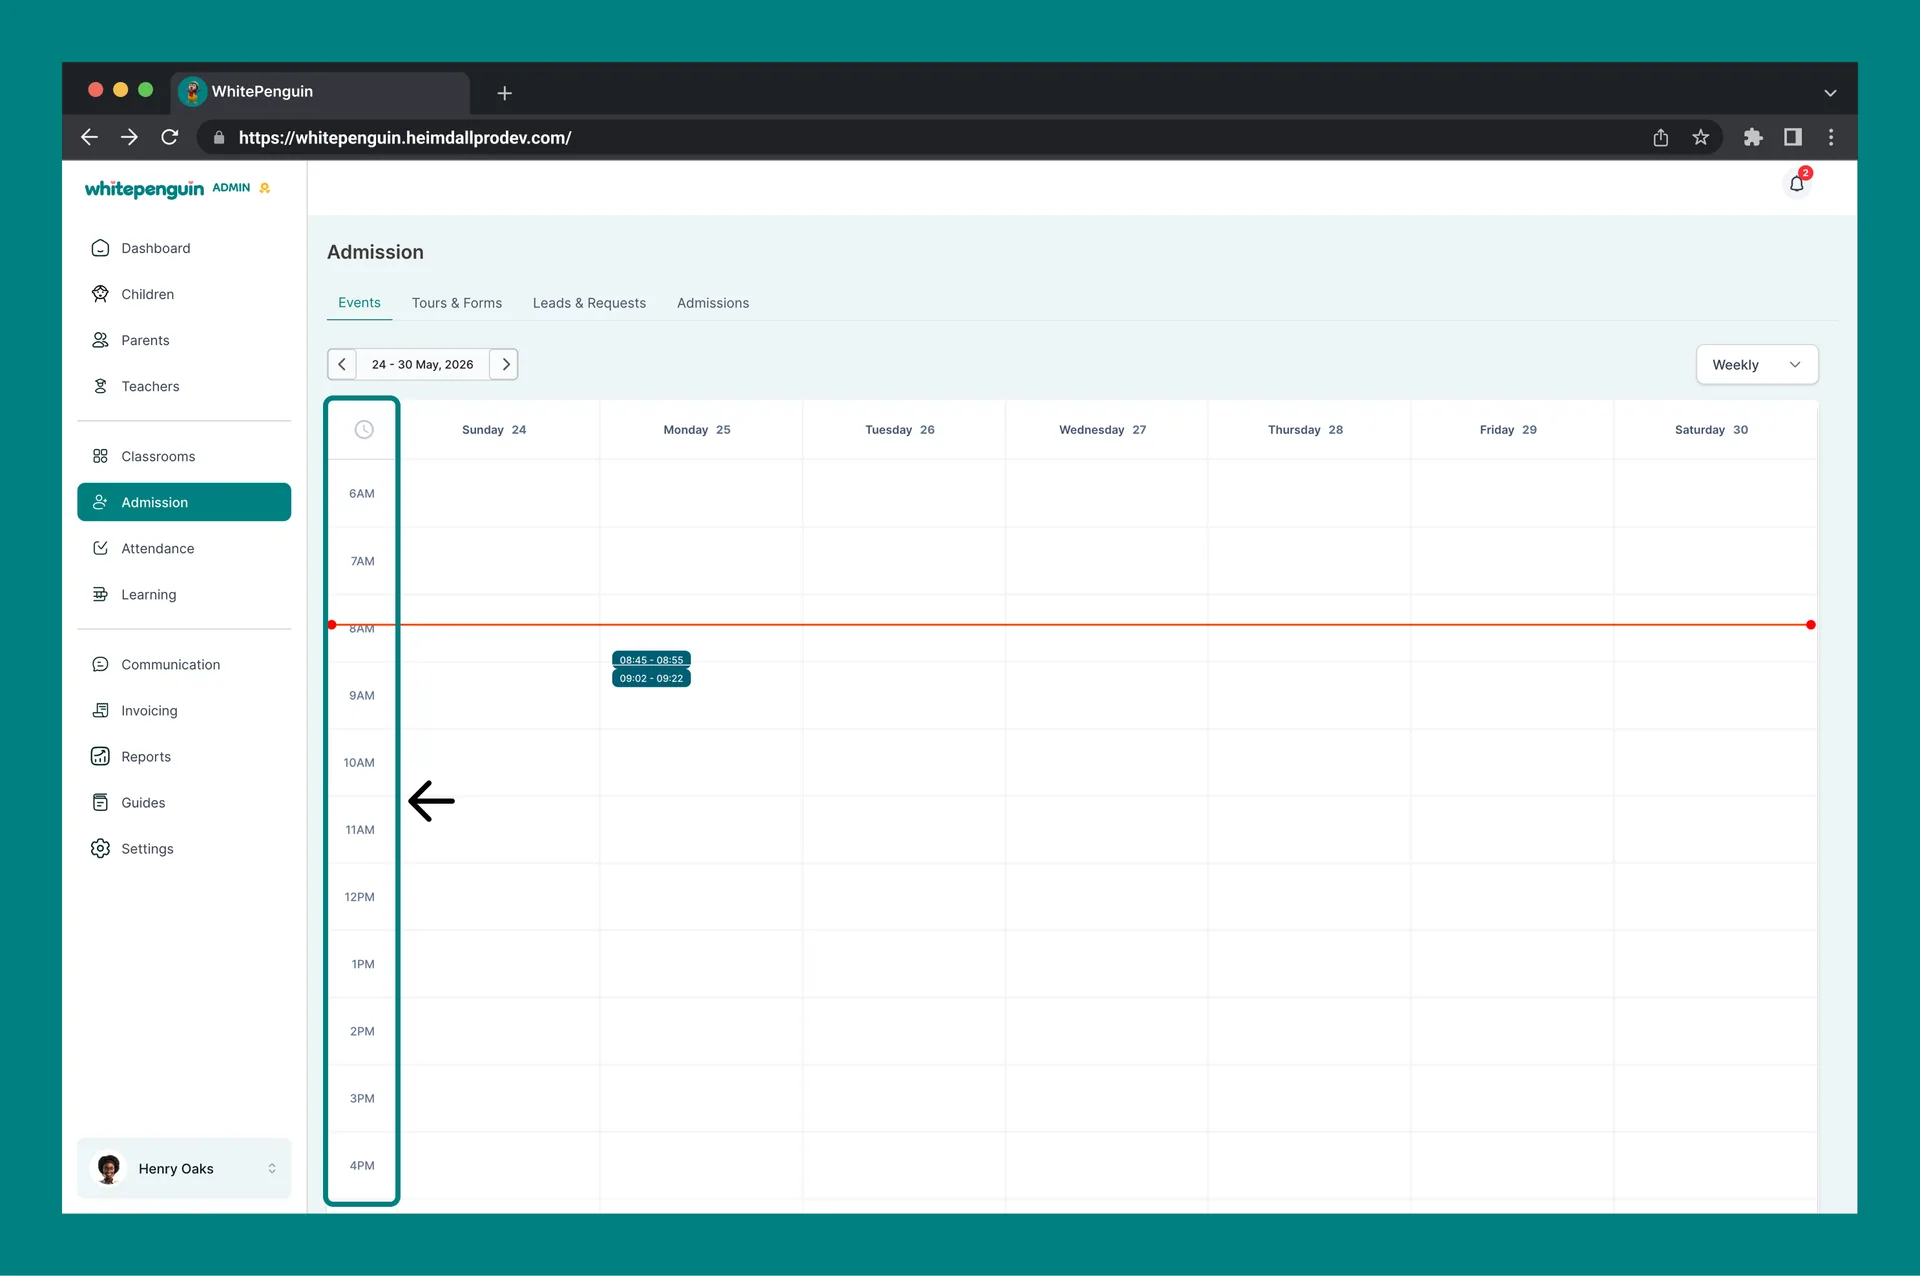
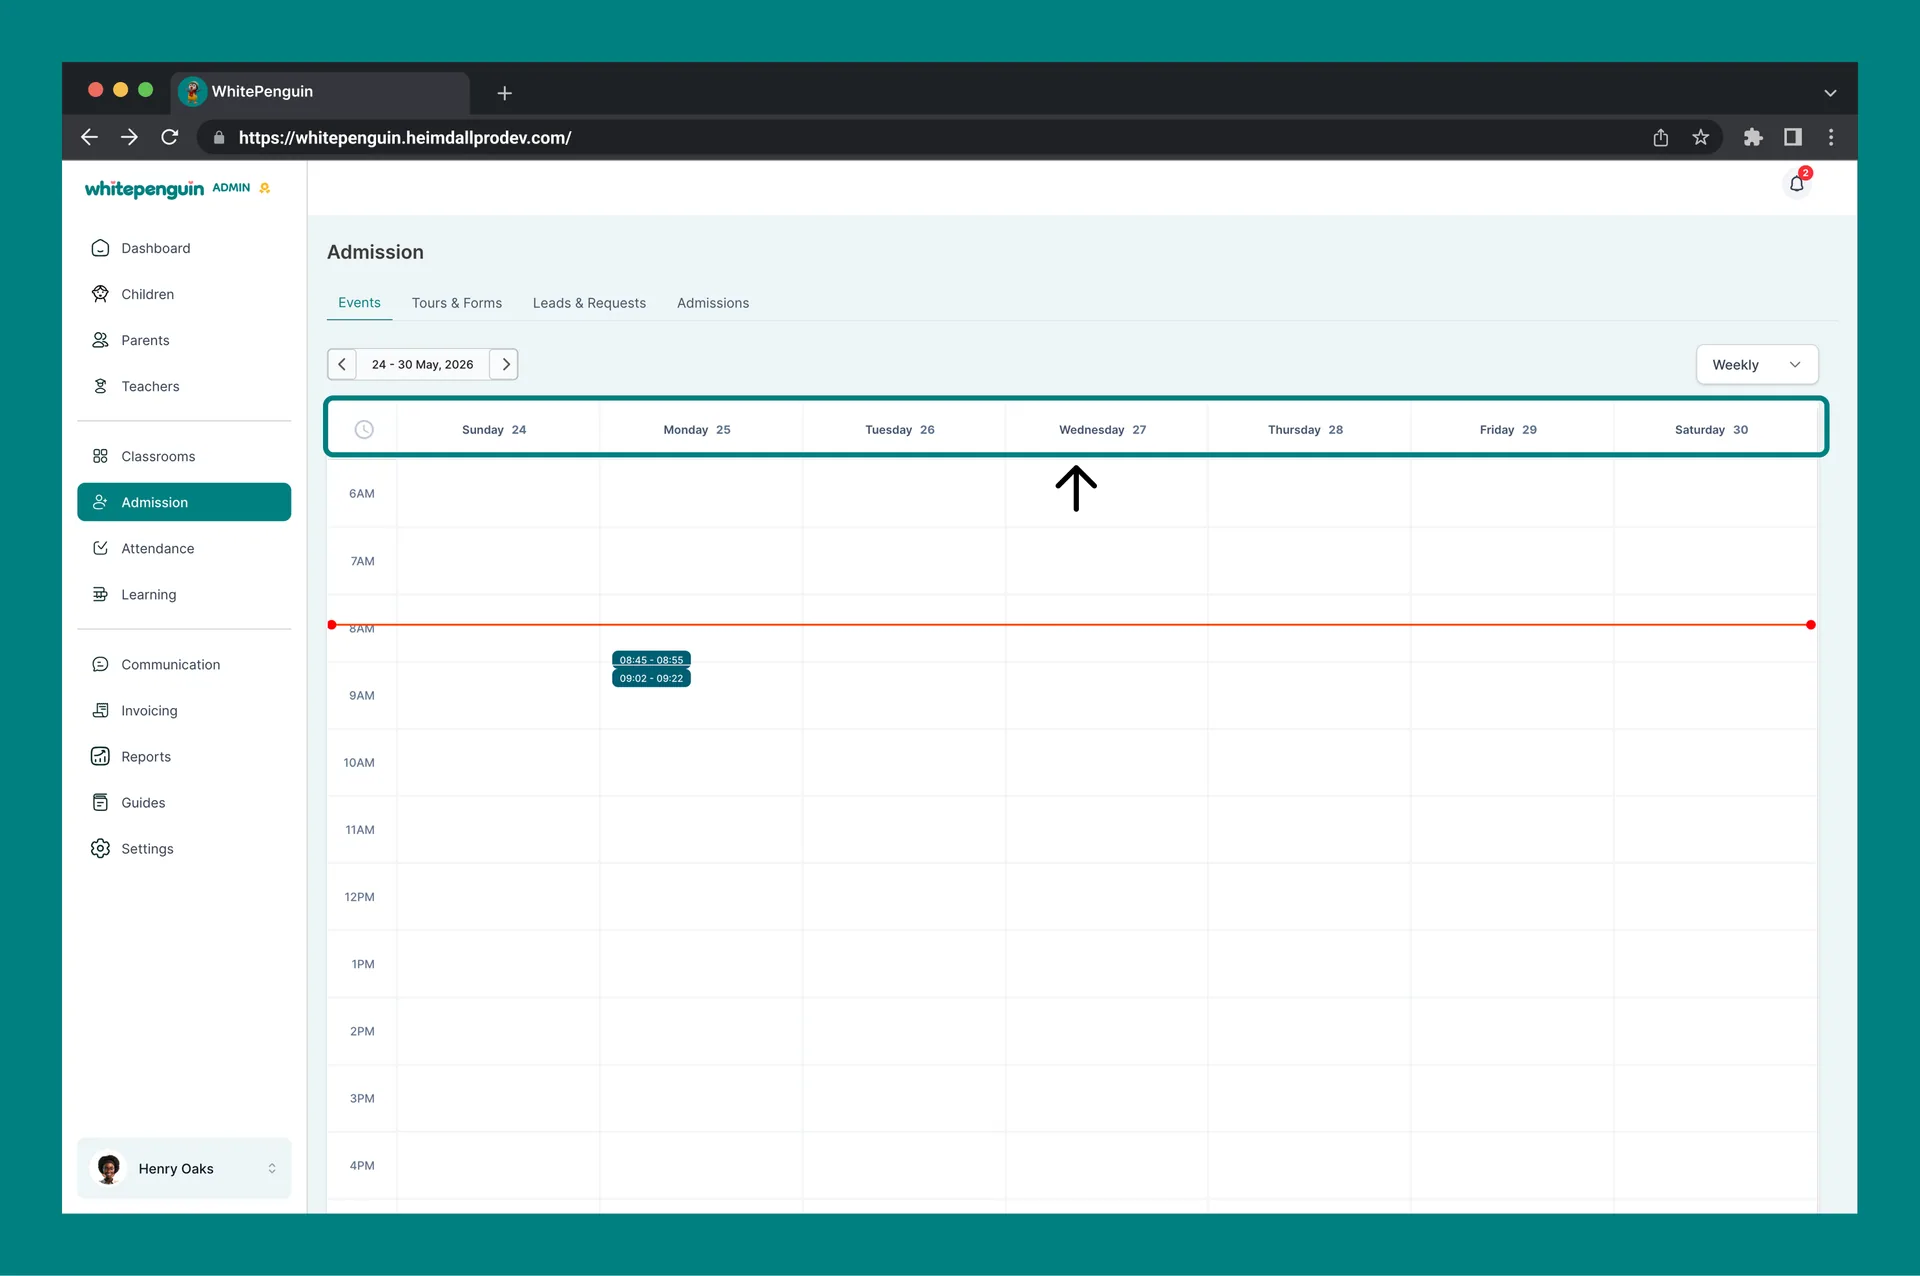
3. Time Grid
- Each row represents one hour of the day (6 AM – 11 PM).
- Each column represents a day in the selected range.
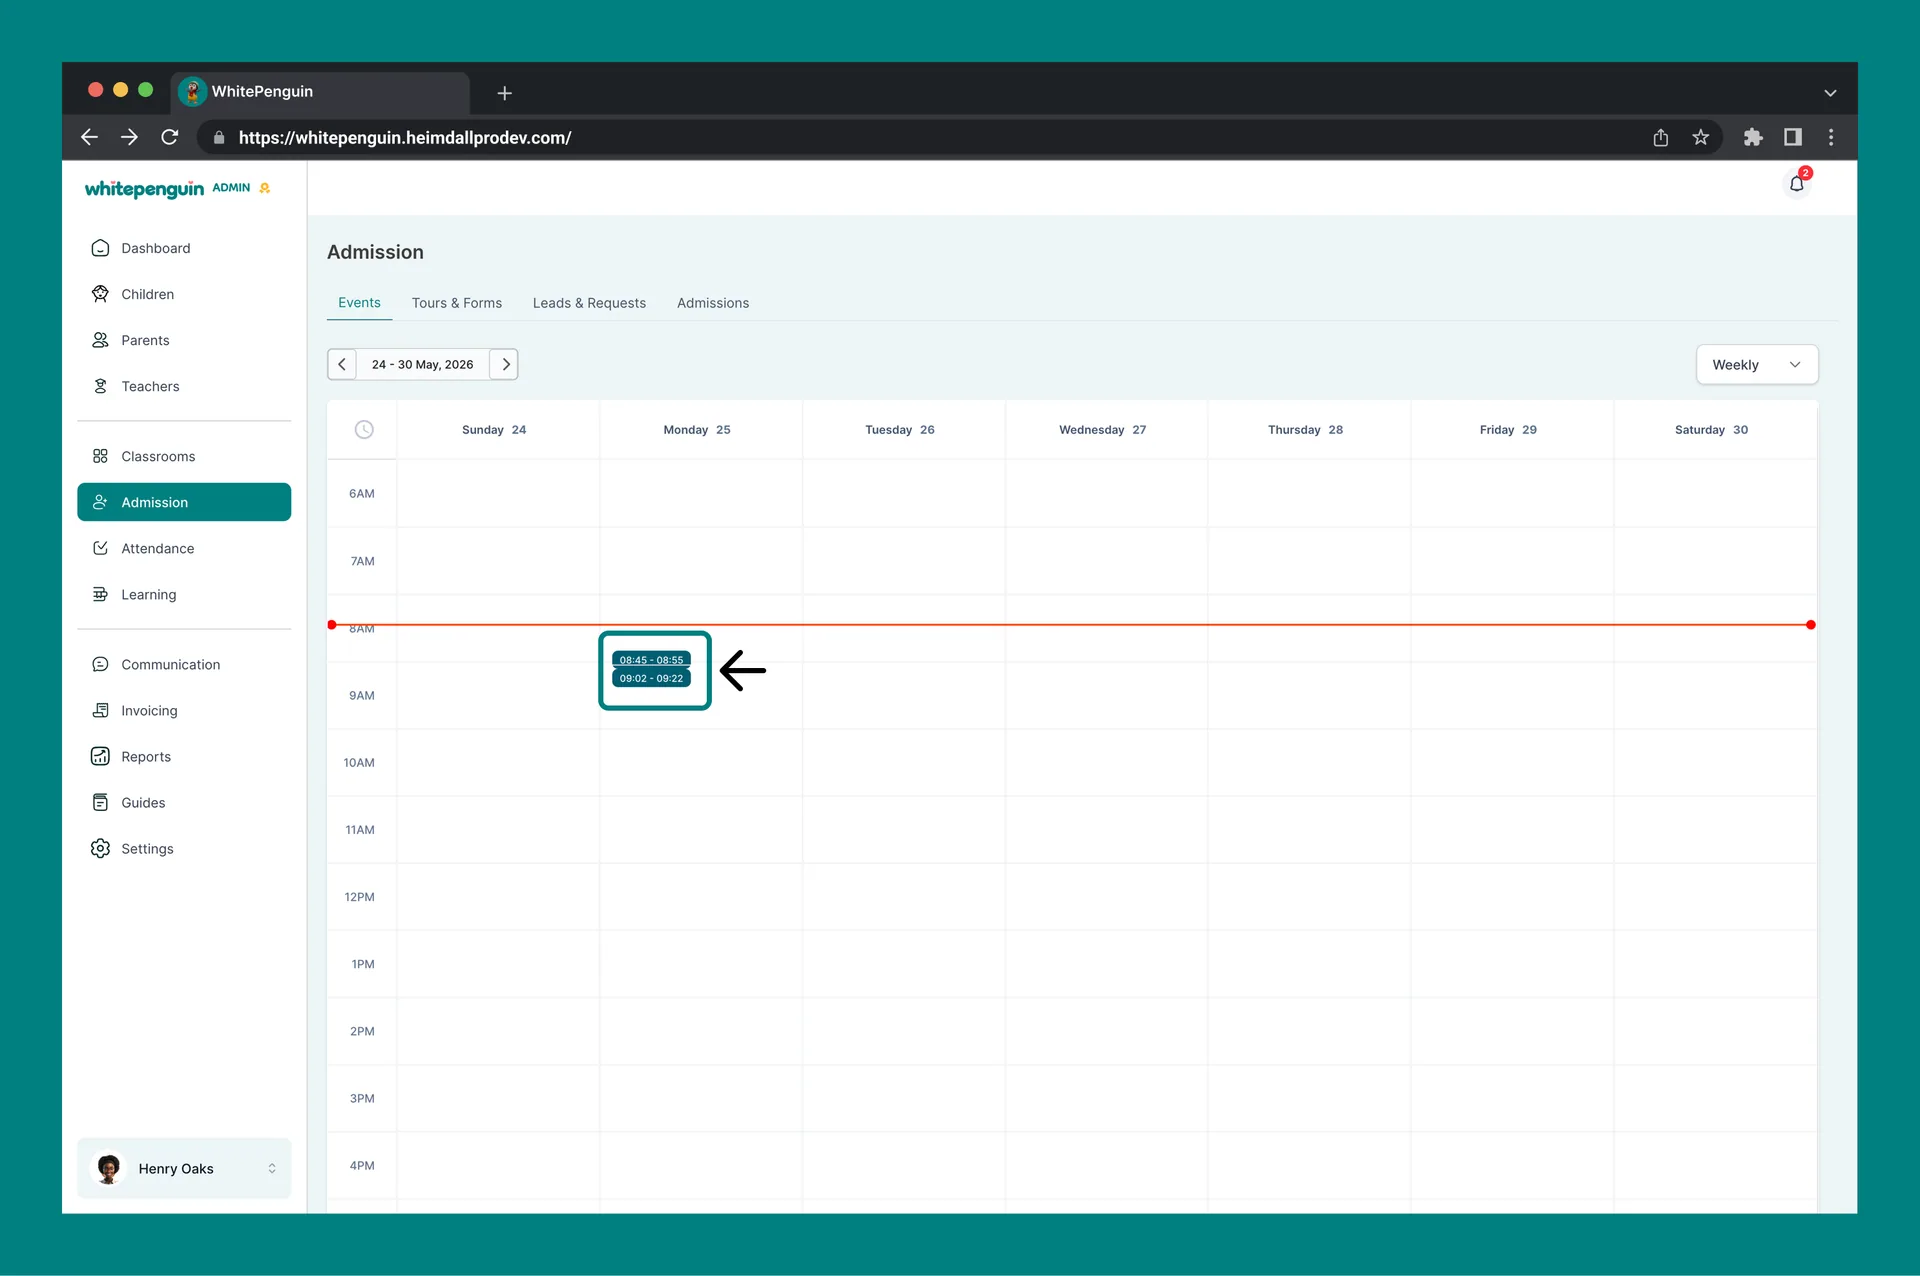
- Tour bookings appear as colored time blocks (e.g. 09:30 AM – 09:45 AM) in the day they are scheduled.
4. Legend (bottom of the calendar)
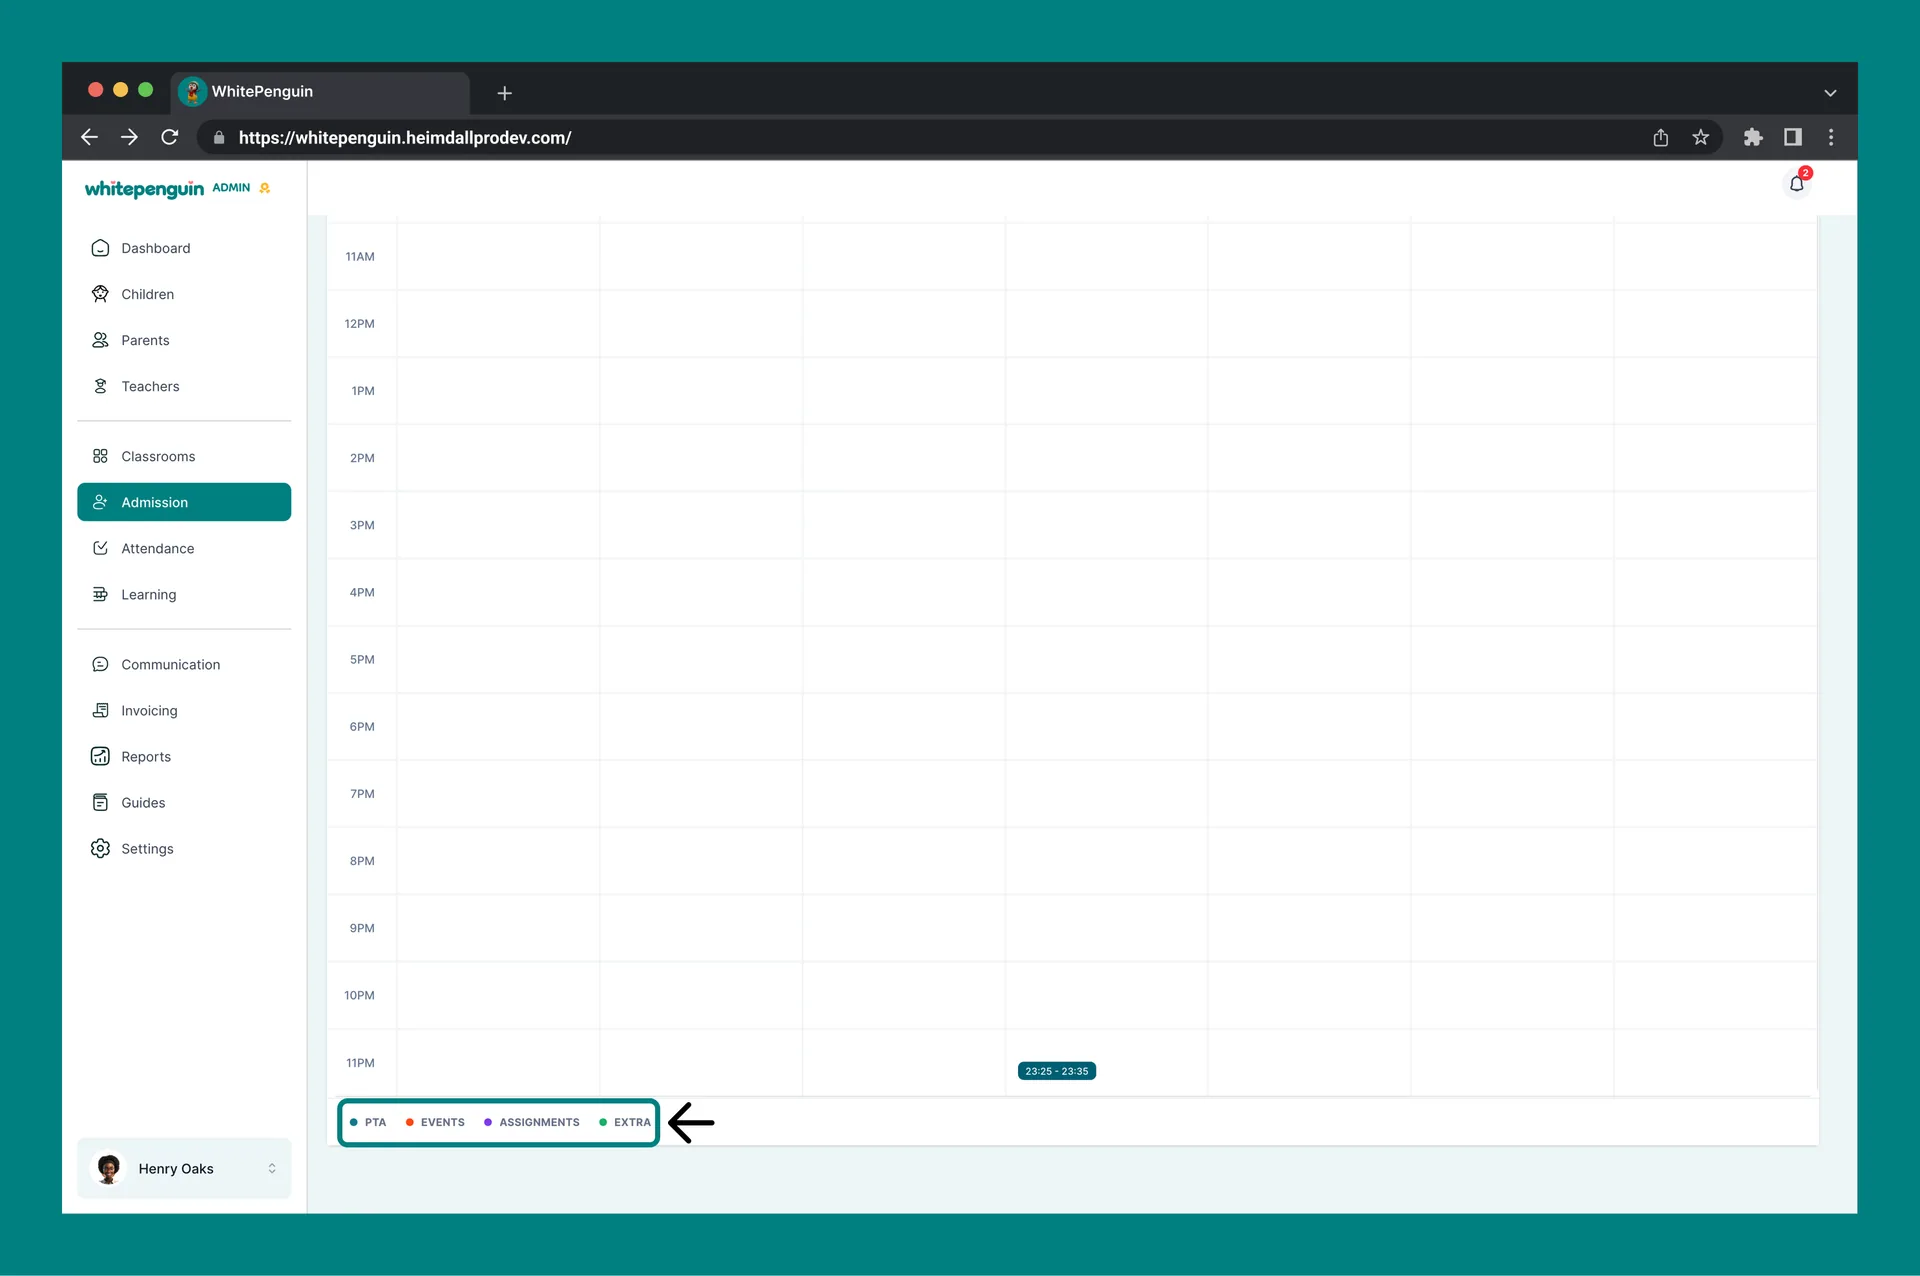
Colored dots show what type of event is being displayed:
- 🟢 PTA — parent-teacher events.
- 🟠 Events — admission tours and general school events.
- 🟣 Assignments — learning-related events.
- 🟢 Extra — other custom events.
Working With a Tour Booking
1. Open a Booking
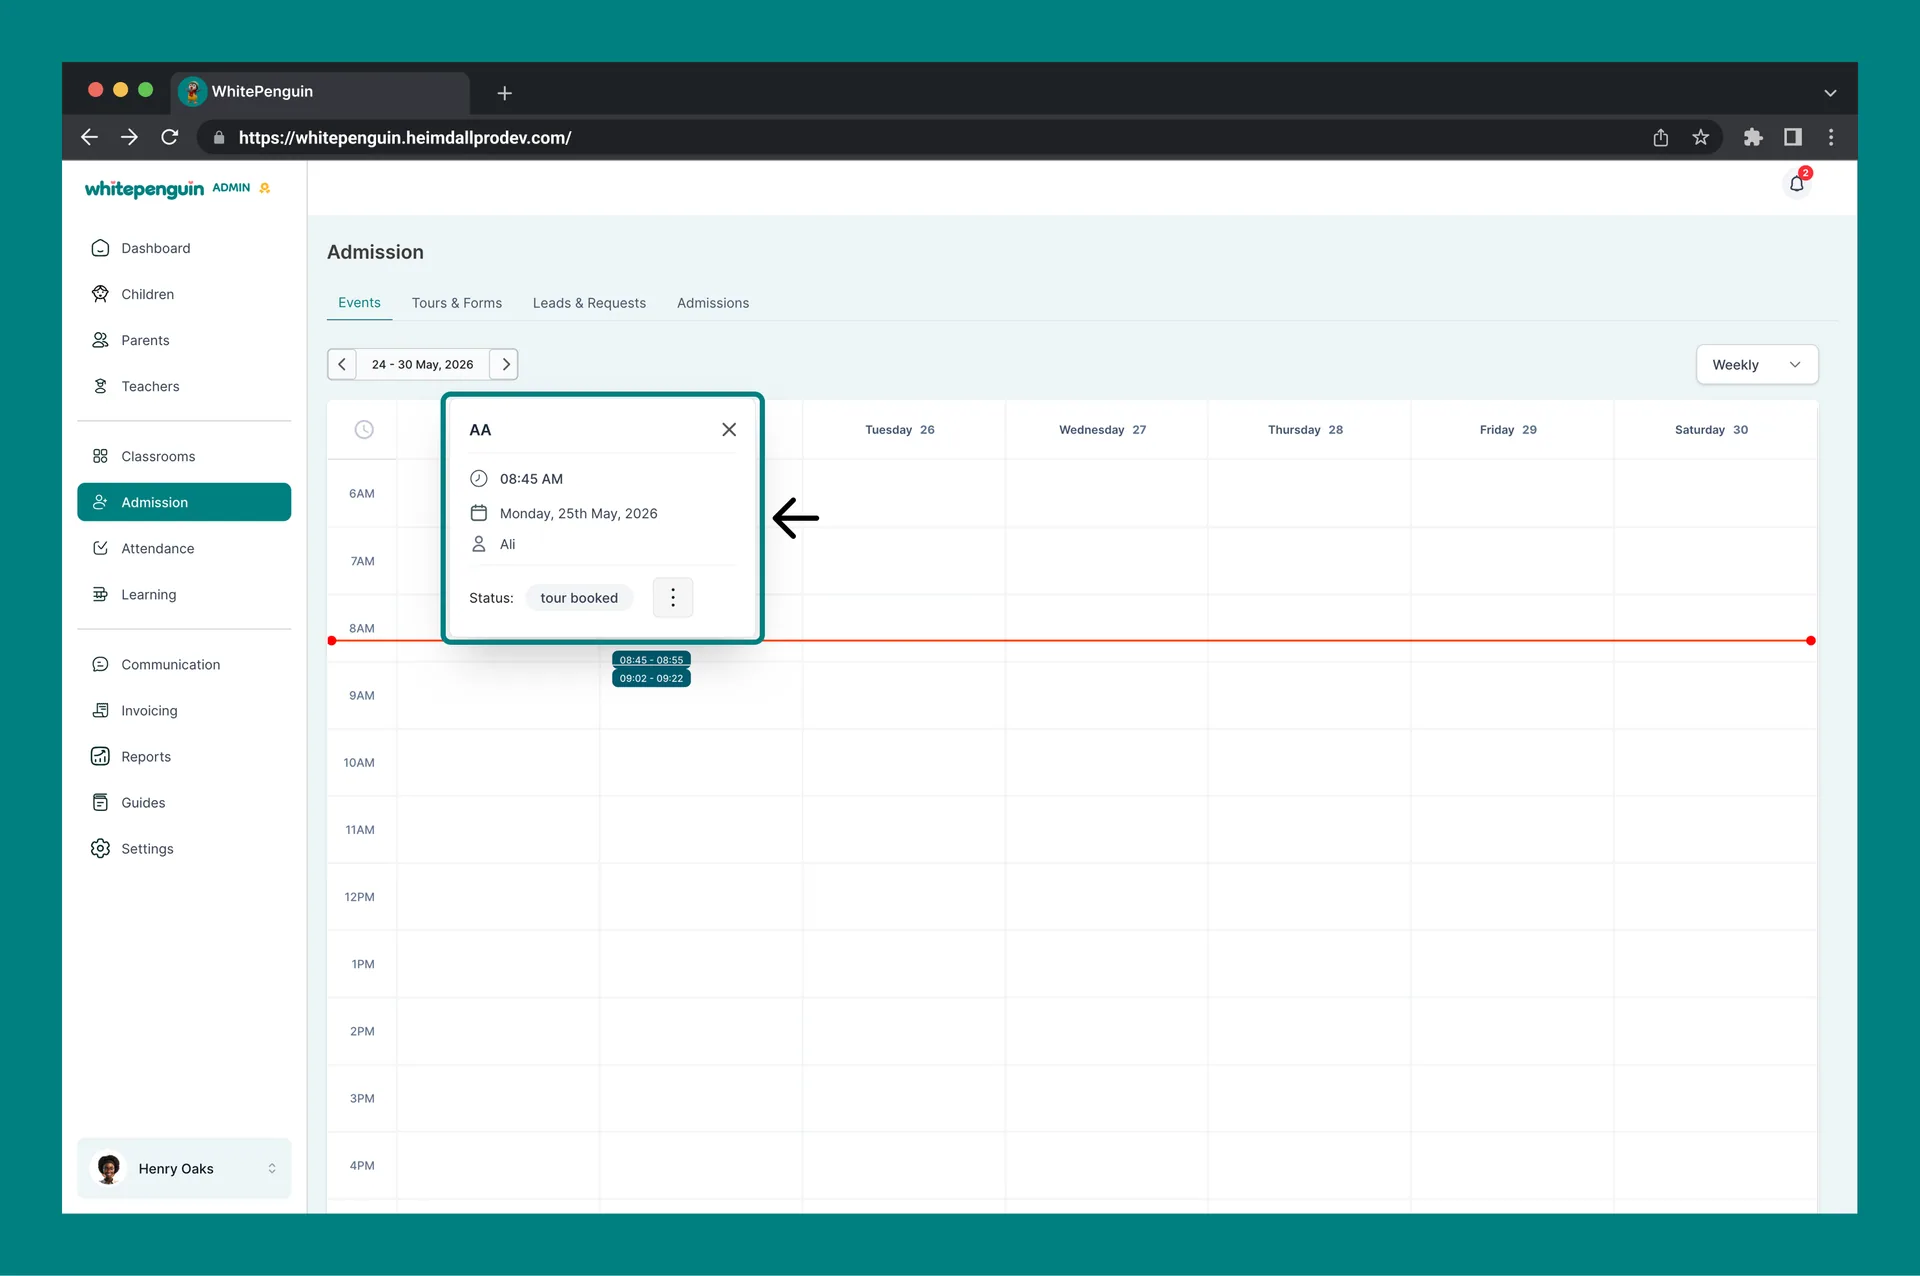
Click any time block in the calendar to open its summary card. The card shows:
- Tour title (e.g. Test).
- Time (e.g. 09:30 AM).
- Date (e.g. Monday, 25th May, 2026).
- Parent name (e.g. A).
- Status badge (e.g. tour booked).
- A three-dot Action menu on the right.
2. Booking Actions
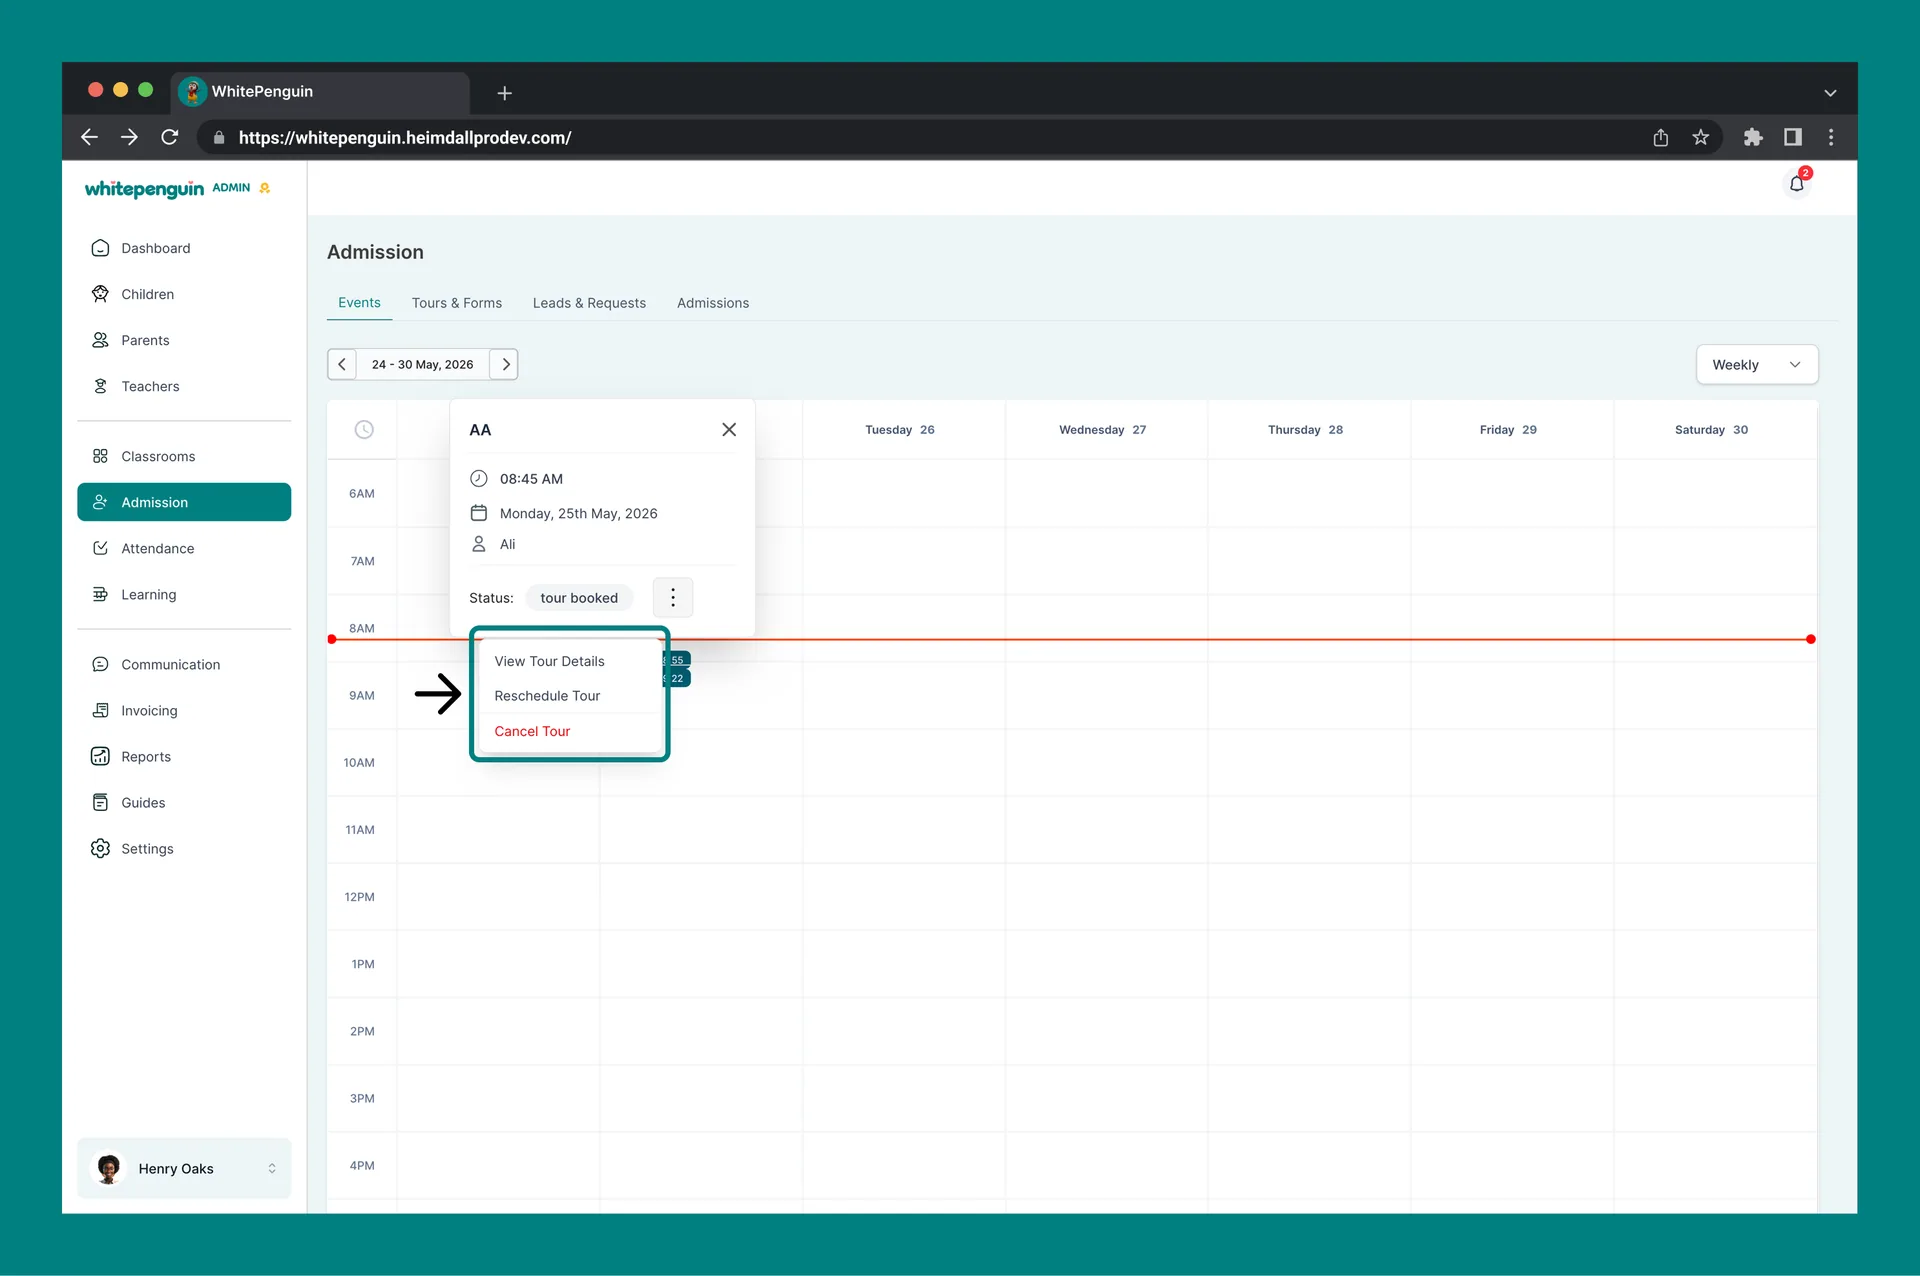
Click the three-dot menu on the booking card to open these actions:
- View Tour Details — opens a full modal with the booking confirmation details.
- Reschedule Tour — opens the Reschedule modal to change date or time.
- Cancel Tour — cancels the booking and notifies the parent.
Cancel Tour is destructive — the parent will receive a cancellation notification and the slot will be released. Use Reschedule Tour instead when you just need to move the time.
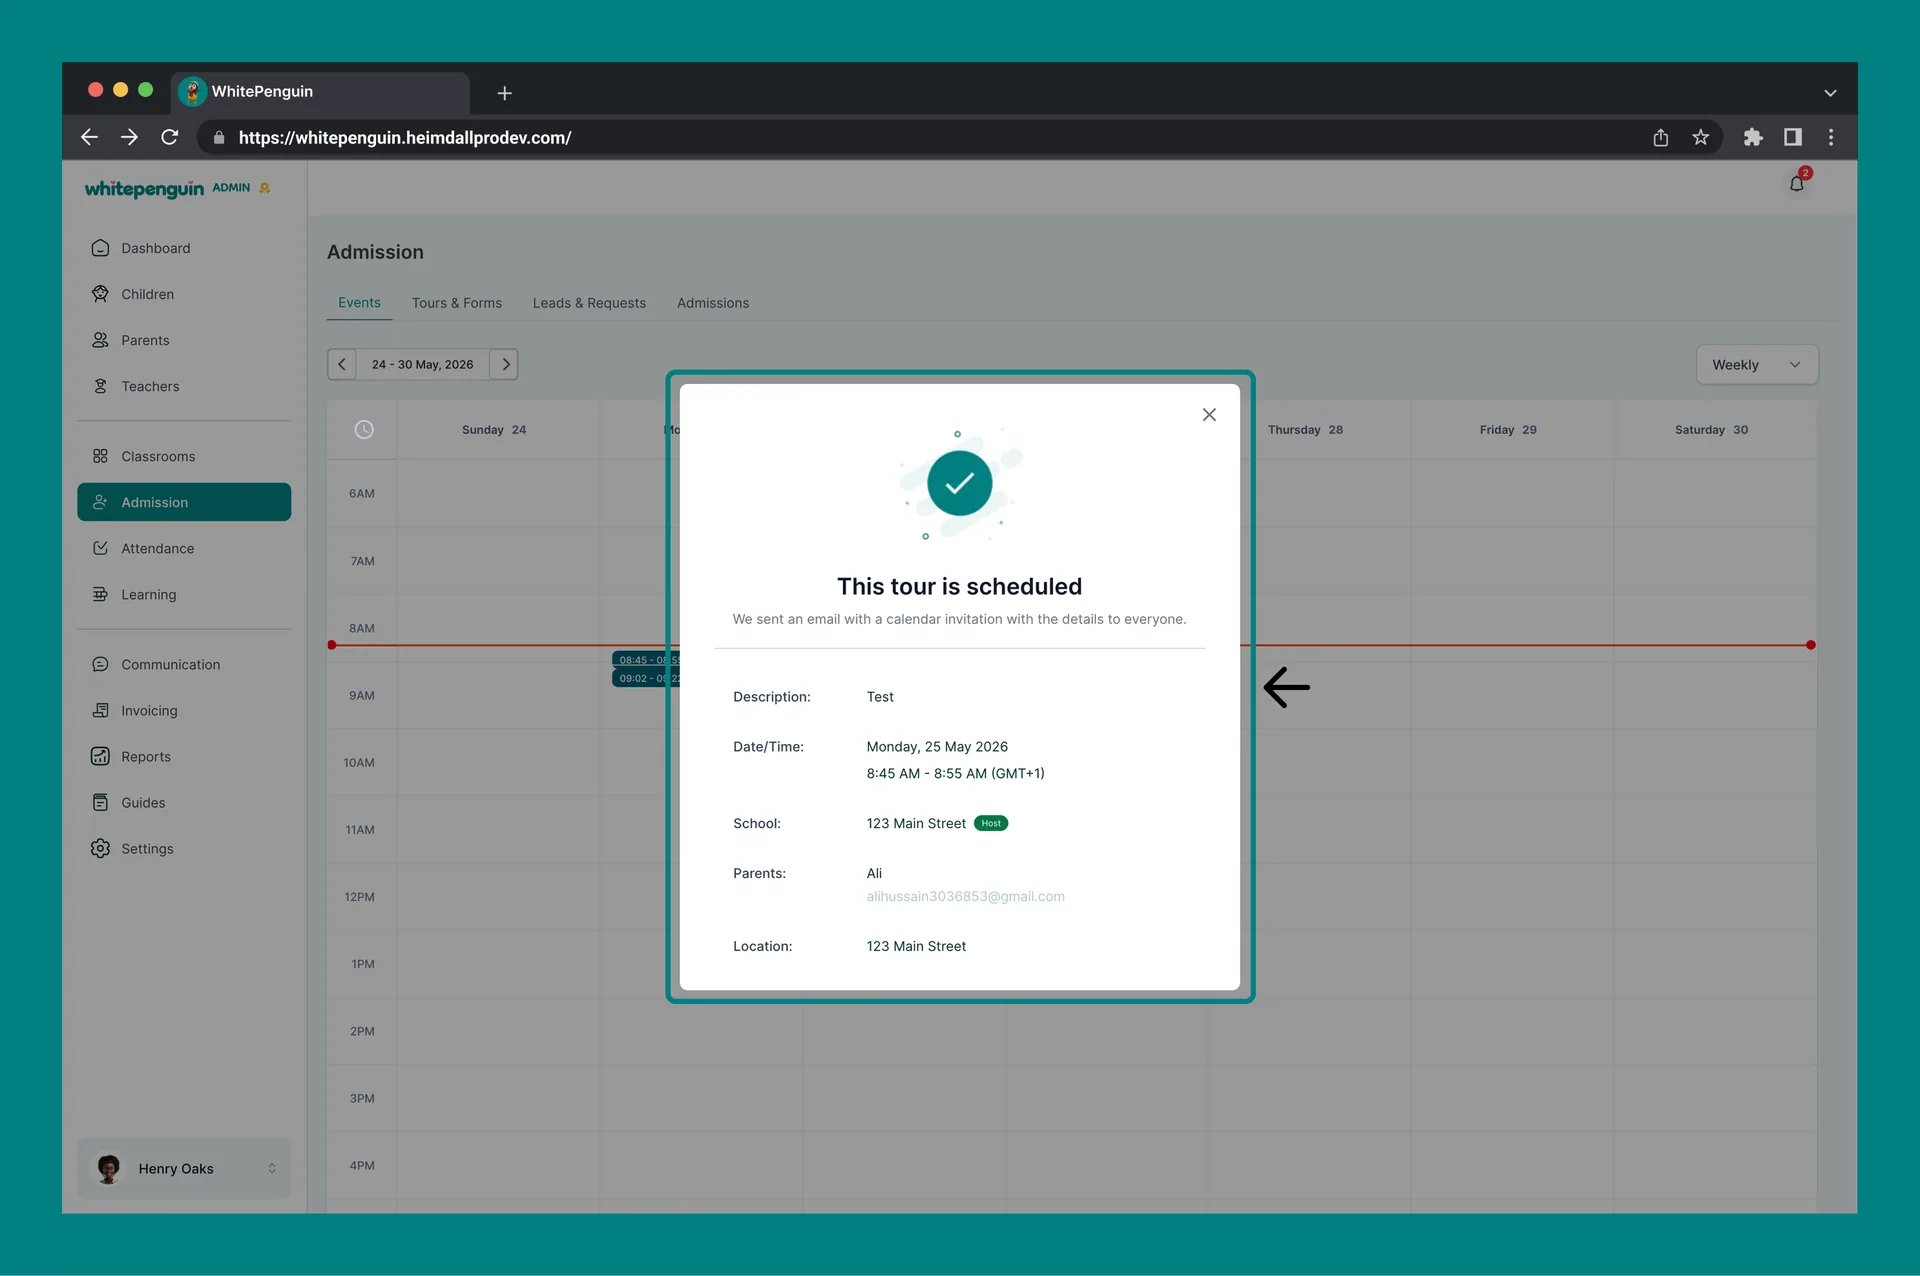
3. View Tour Details
The This tour is scheduled modal confirms the booking and shows:
- Description — the tour description set when the tour event was created.
- Date/Time — the full scheduled window in the school's timezone (e.g. Monday, 25 May 2026, 9:30 AM – 9:45 AM (GMT+3)).
- School — the campus/branch the tour is held at, with the Host tag.
- Parents — the parent name and email that booked the slot.
- Location — the physical location of the tour.
A calendar invitation with these details is automatically emailed to everyone involved when the tour is booked or rescheduled.
4. Reschedule a Tour
-
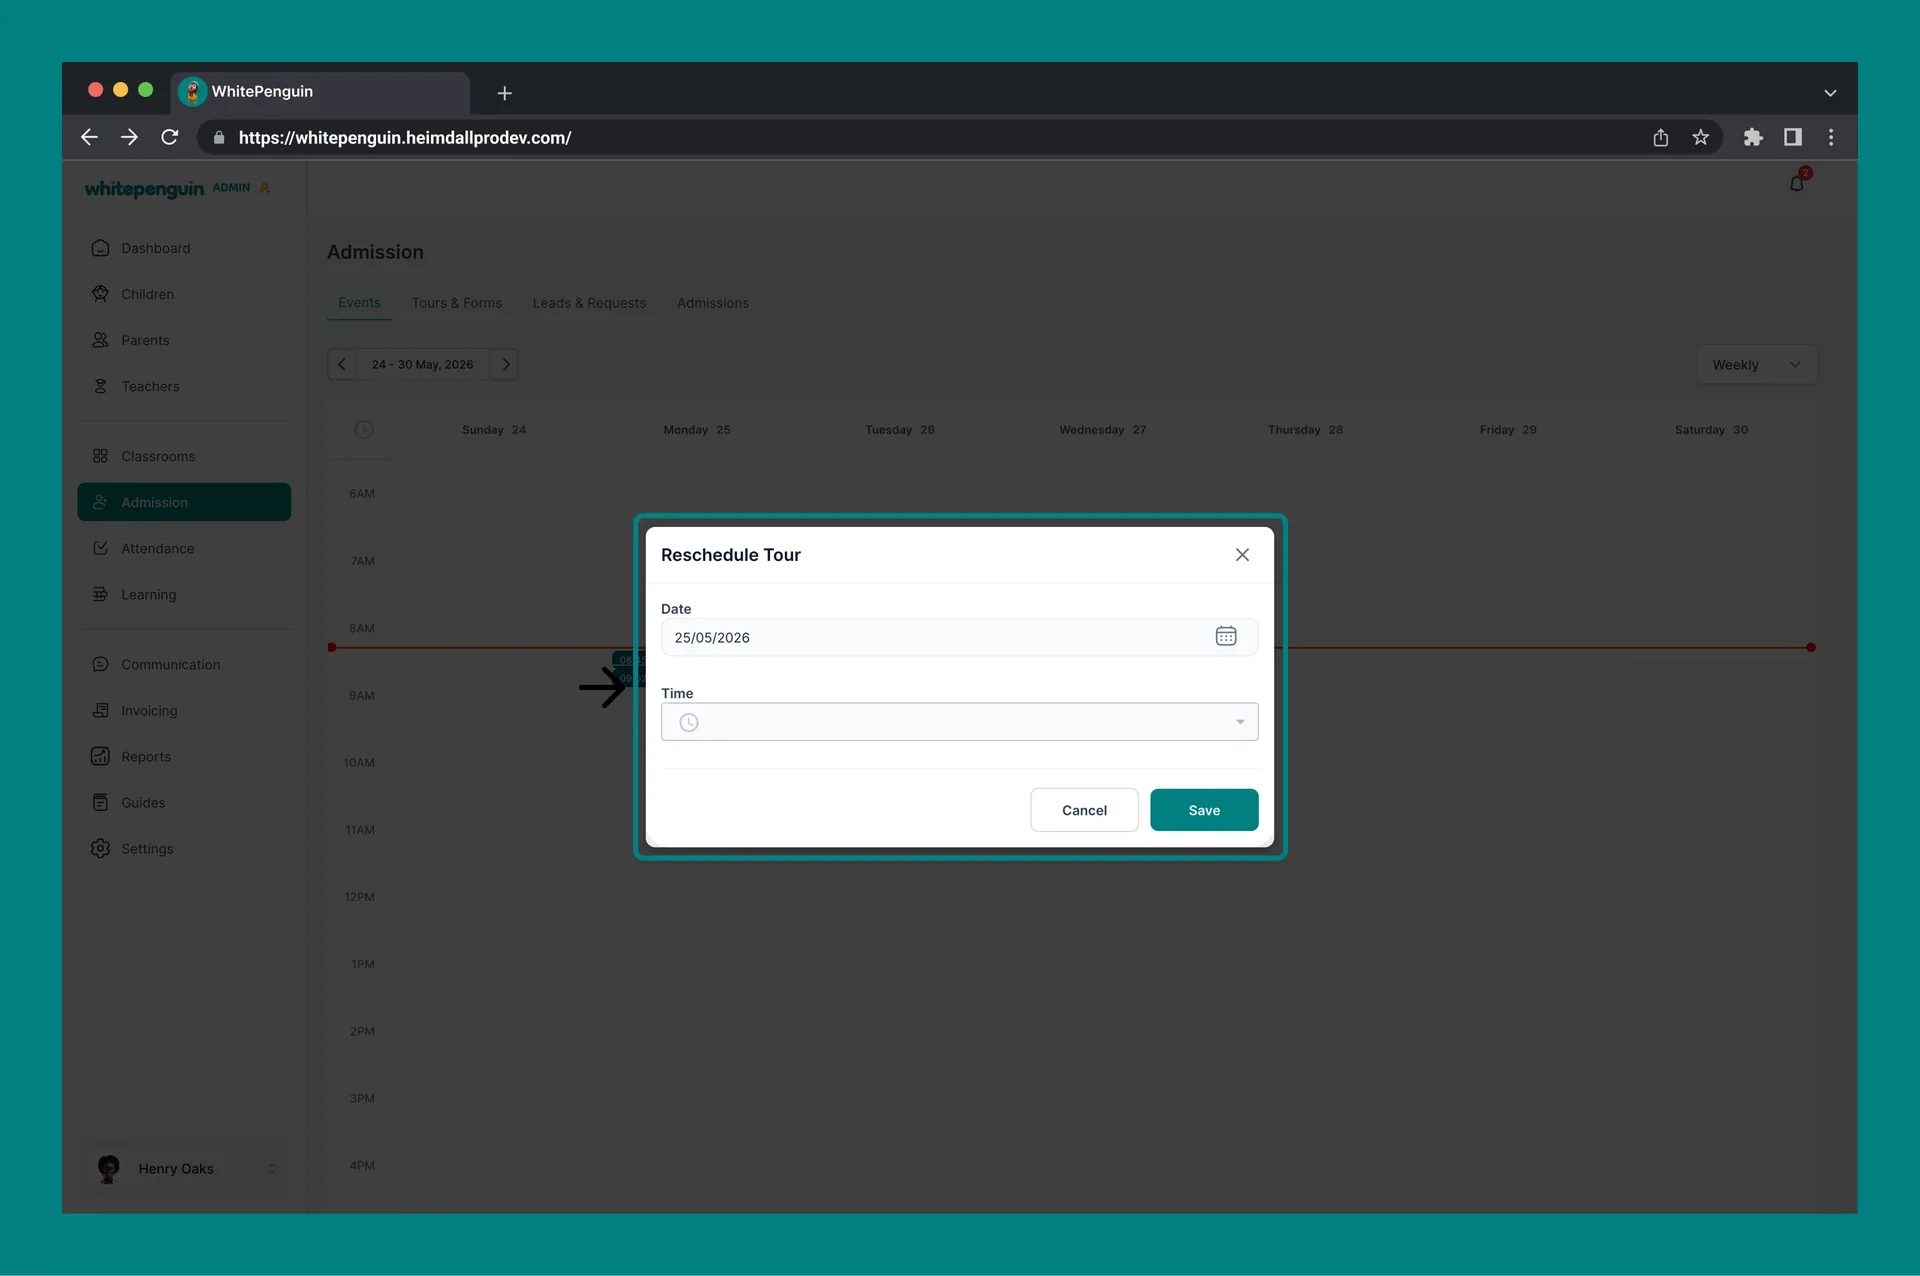
From the booking card, click the three-dot menu → Reschedule Tour.
-
The Reschedule Tour modal opens with two fields:
- Date* — pick the new date from the calendar picker (format: DD/MM/YYYY).
- Time* — pick the new time slot from the dropdown.
-
Click Save to confirm.
-
The parent is automatically notified of the new date and time.
-
The booking moves to its new position on the calendar.
Available times in the Time dropdown are based on the tour event's configured availability and time-slot intervals. If no times appear, check the tour's Availability settings on the Tours & Forms tab.
Tour Status on the Calendar
The status badge on each booking reflects where the lead is in the admission journey:
| Status | What It Means |
|---|---|
| tour booked | Parent has reserved the slot. Awaiting the tour day. |
| tour completed | Admin has marked the tour as done. The lead is ready for an offer. |
| tour cancelled | The tour was cancelled by the admin or the parent. |
| tour rescheduled | The tour was moved to a new date/time. Parent has been notified. |
Tips & Related Info
- Default view is Weekly — great for planning the next 7 days at a glance. Switch to Daily when you want a focused view of a specific day, or Monthly when planning ahead.
- Empty calendar? That just means no events are booked in the selected range. Use the ‹ / › arrows or jump to another week to find activity.
- Tours appear automatically — you never need to add a tour booking manually here. Bookings flow in from the public tour link parents use.
- Reschedule instead of cancelling when possible — it preserves the lead in your Leads & Requests pipeline.
- All bookings also appear in Leads & Requests with a matching status, so you can manage from whichever tab you prefer.
- Timezone — the time shown in tour details reflects the school's configured timezone (e.g. GMT+3). Make sure your school timezone is set correctly in Settings so parents see the right times.
FAQs
Tour bookings come from parents using the public tour link you created on the Tours & Forms tab. Other items (PTA, Assignments, Extra) come from their respective modules in WhitePenguin. The Events Calendar is the unified view across all of them.
Yes. Use the view dropdown at the top right of the calendar (default is Weekly). Pick Daily, Weekly, or Monthly to change the layout. The date range navigator on the left will adjust to step by day, week, or month accordingly.
Click the tour block to open its summary card, click the three-dot menu, then choose Reschedule Tour. Pick a new Date and Time in the modal and click Save. The parent will be notified automatically.
Cancelling a tour removes the booking from the calendar, releases the time slot, and notifies the parent. The corresponding lead in Leads & Requests will reflect the cancellation. If you only want to move the tour, use Reschedule Tour instead.
Either no tours have been booked yet, or no events fall within the selected date range. Use ‹ / › to browse other periods, or switch to Monthly view to see a wider window at once. If you have not created any tours yet, go to Admission → Tours & Forms → Create New → + Create Tour.
Yes. Whenever a tour is rescheduled or cancelled, the parent receives an automatic notification with the updated details (or cancellation confirmation). A calendar invitation with the new time is also sent for reschedules.
Tour times are shown in your school's configured timezone (for example, GMT+3). The timezone is displayed in the Date/Time row of the tour details modal. Update your school's timezone in Settings → School Profile if it needs to change.
Every tour booking that appears on the calendar also creates a lead on the Leads & Requests tab with status Tour Scheduled. Status updates (completed, cancelled, rescheduled) are synced between the two views. You can manage the lead from either place.
Last updated on