

Log Meals
Log meals in WhitePenguin to keep daily records up to date and (optionally) notify parents/guardians.
Overview
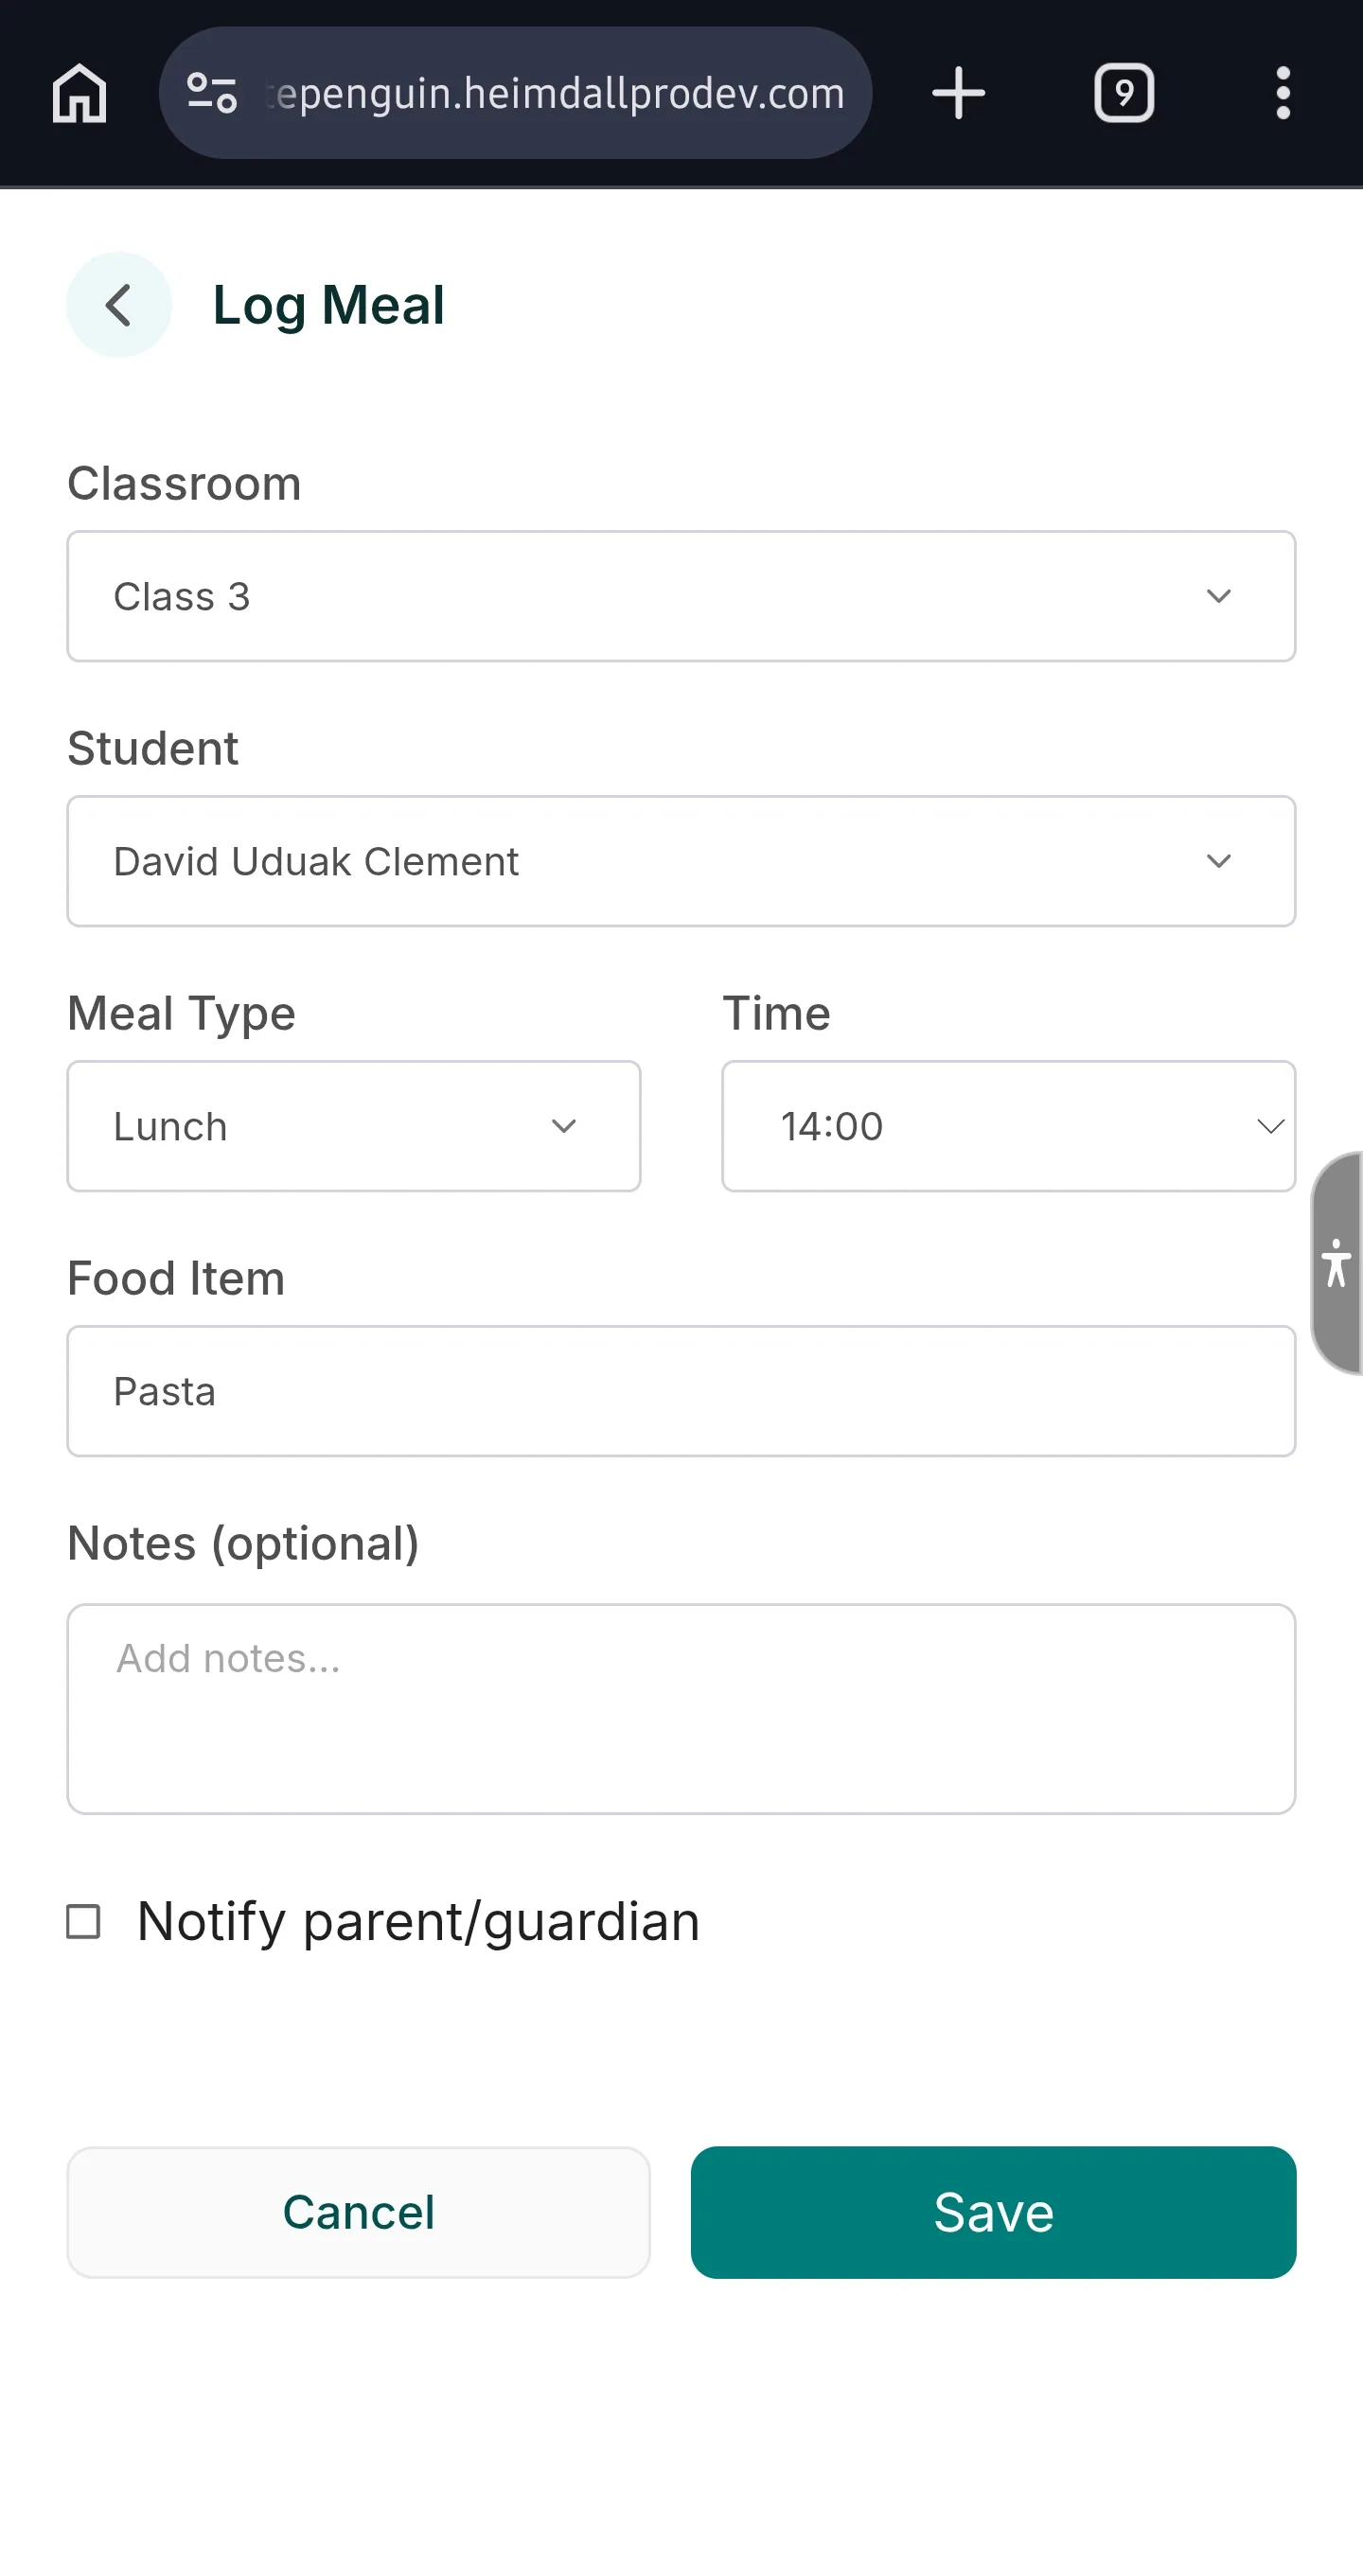
Use Log Meal to record a child’s meals during the day. Each entry shows in the Activities feed and helps admins and staff keep a clear history of what was logged.
You can record:
- Classroom
- Student
- Meal Type
- Time
- Food Item
- Notes (optional)
- Notify parent/guardian (optional)
How to access
-
Admins
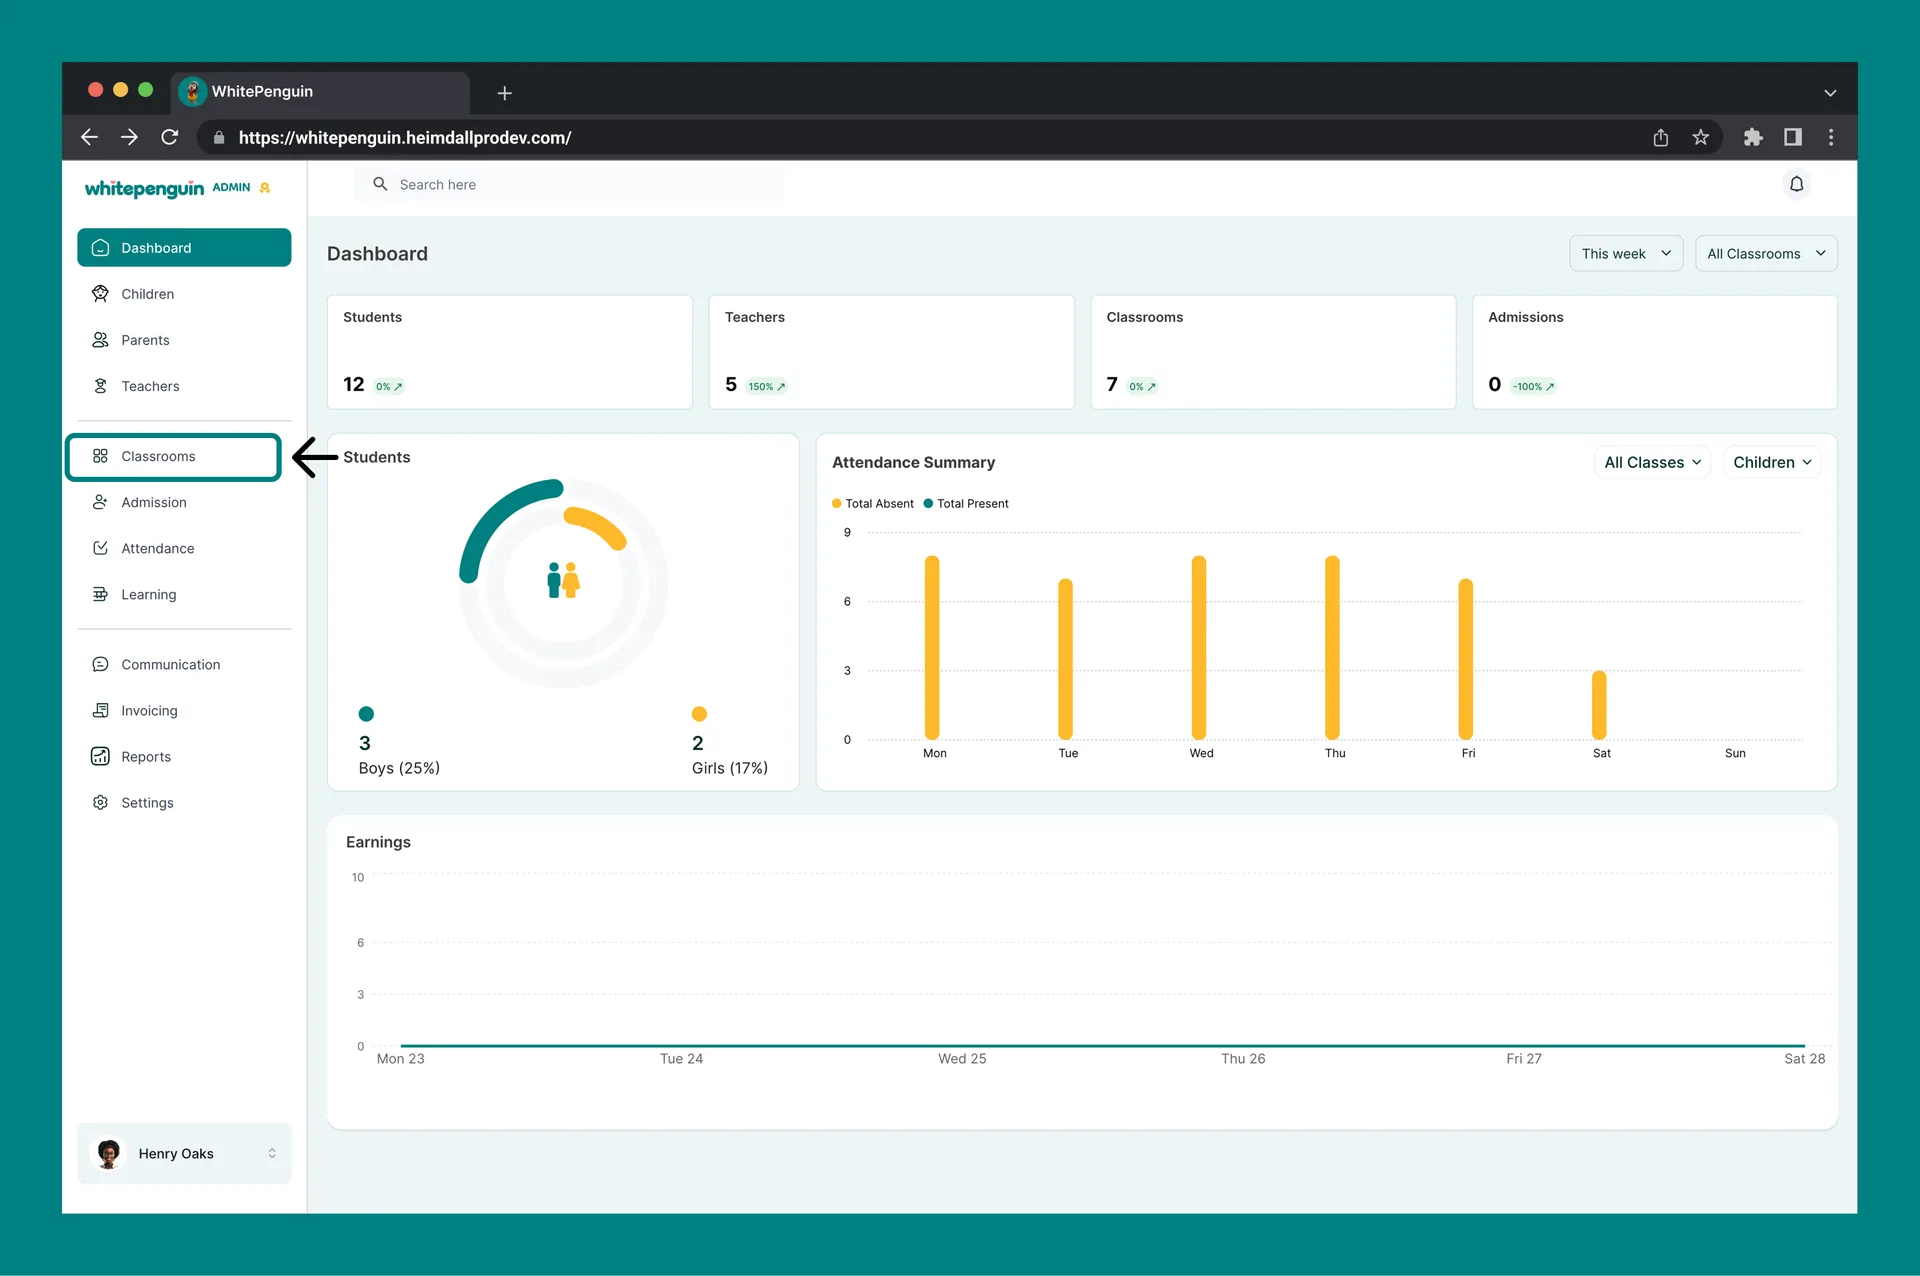
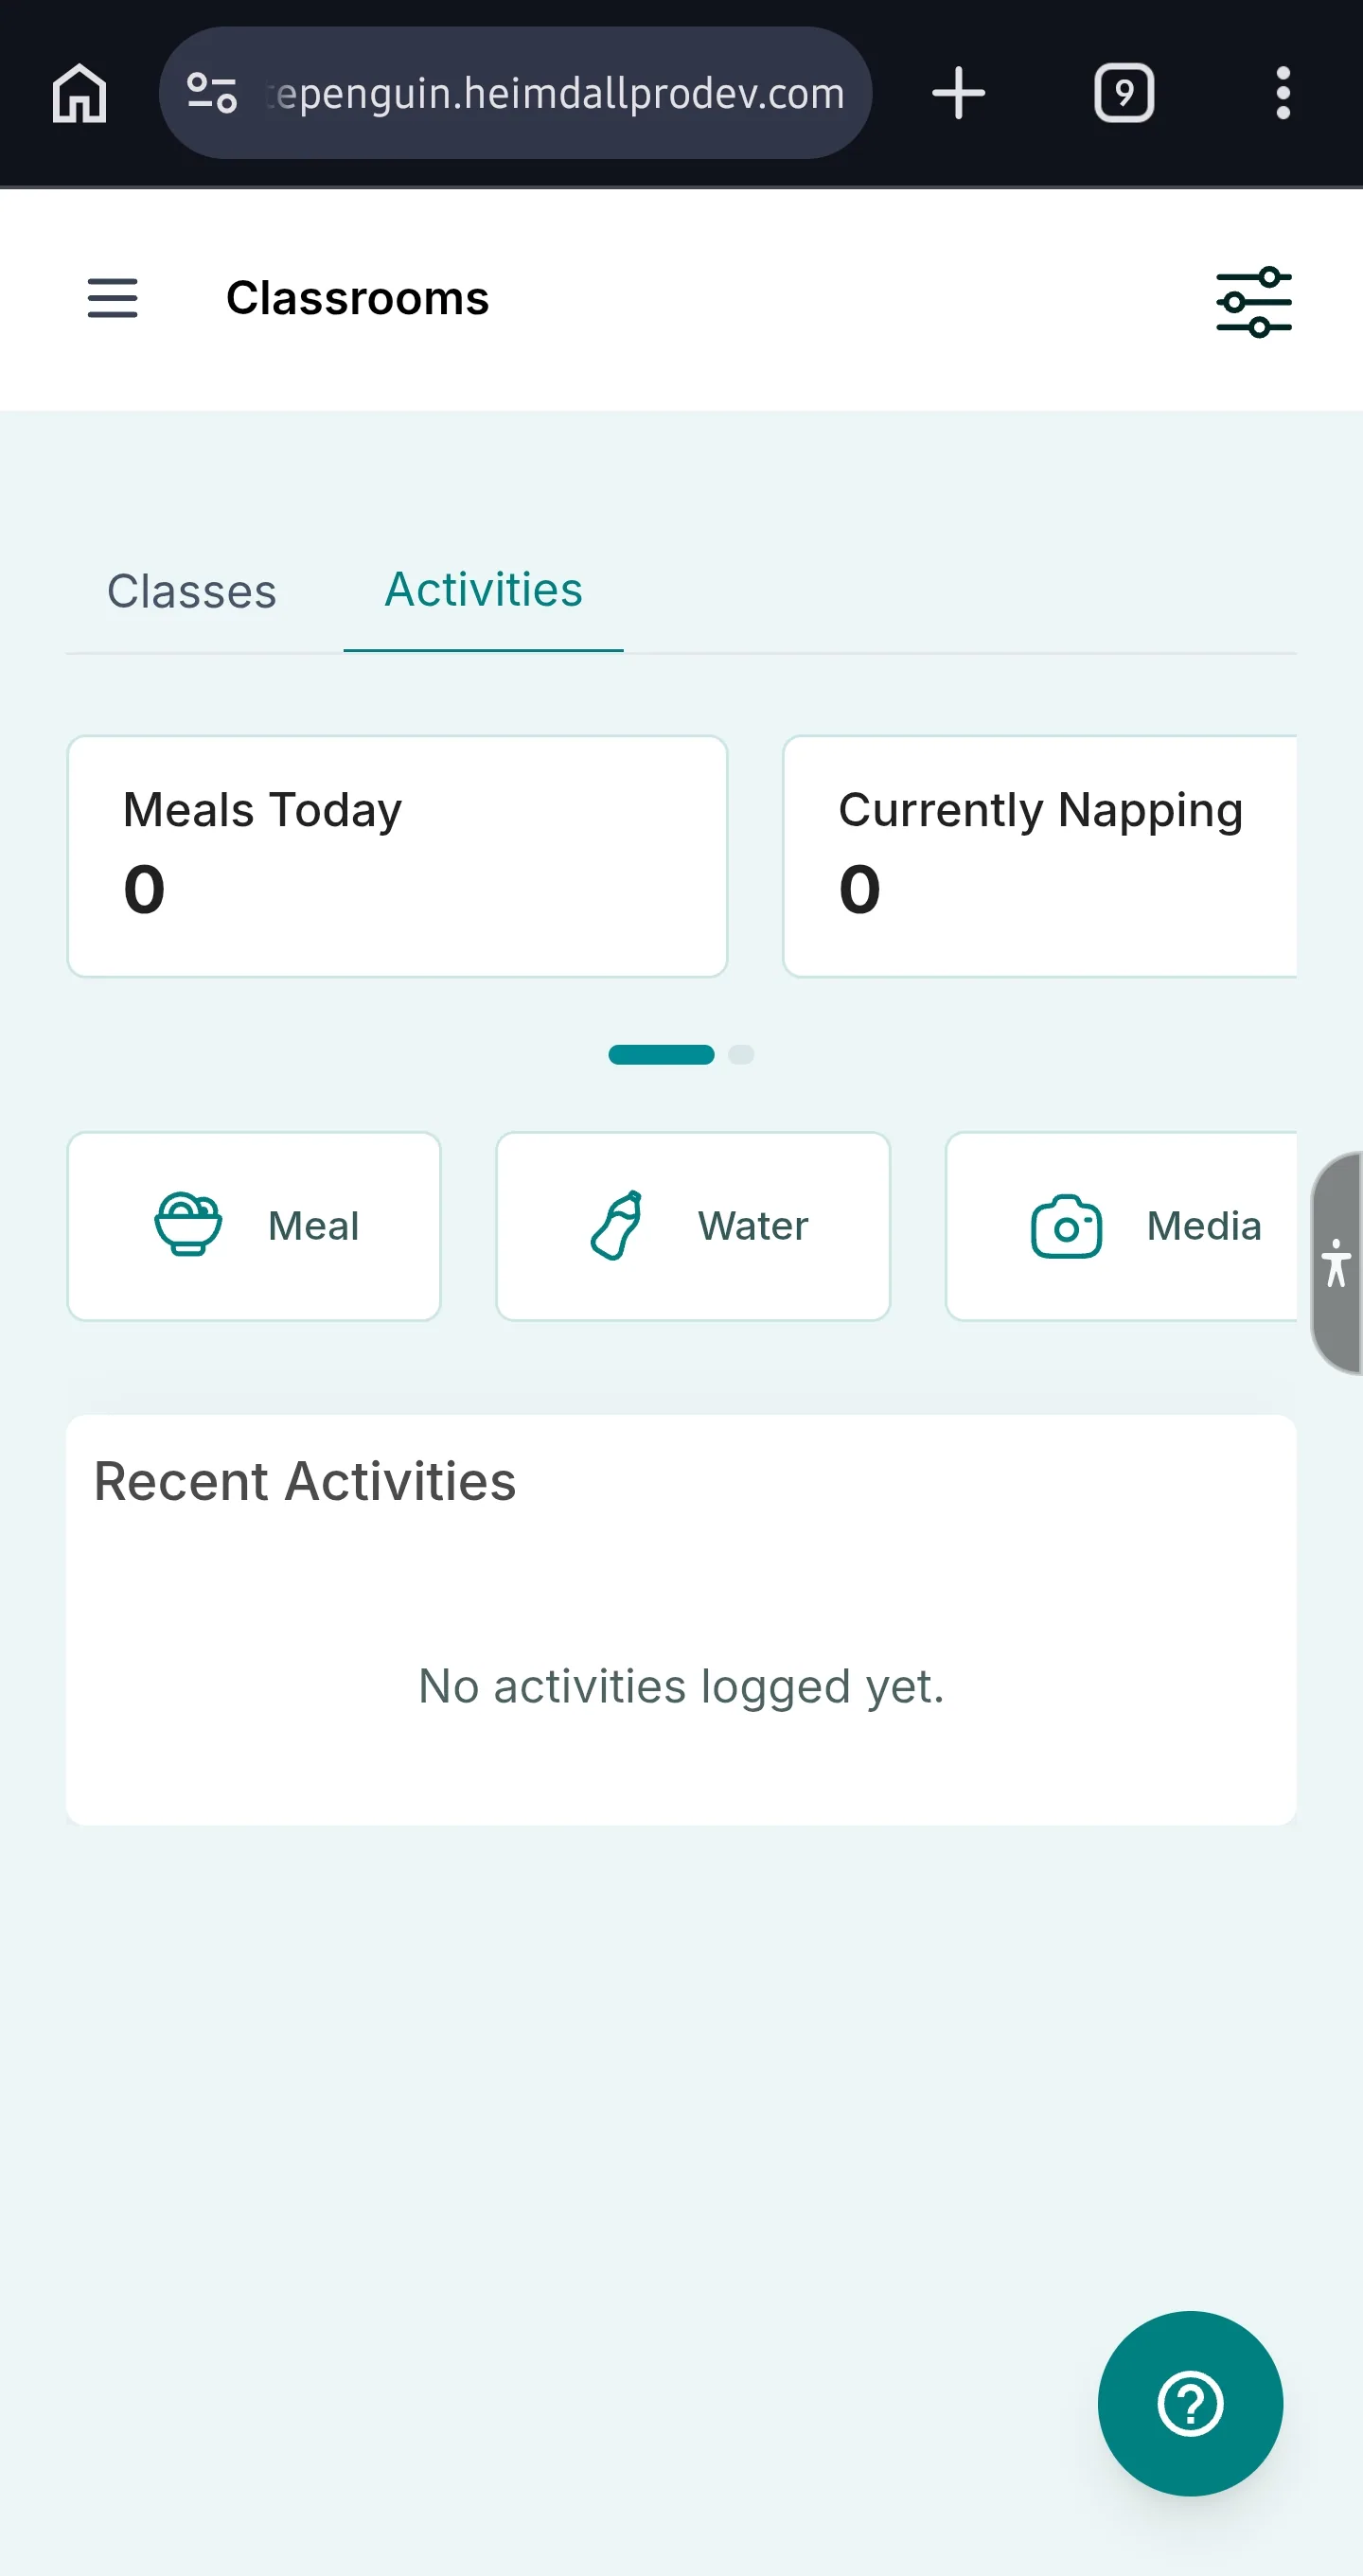
- Click Classrooms in the left sidebar.
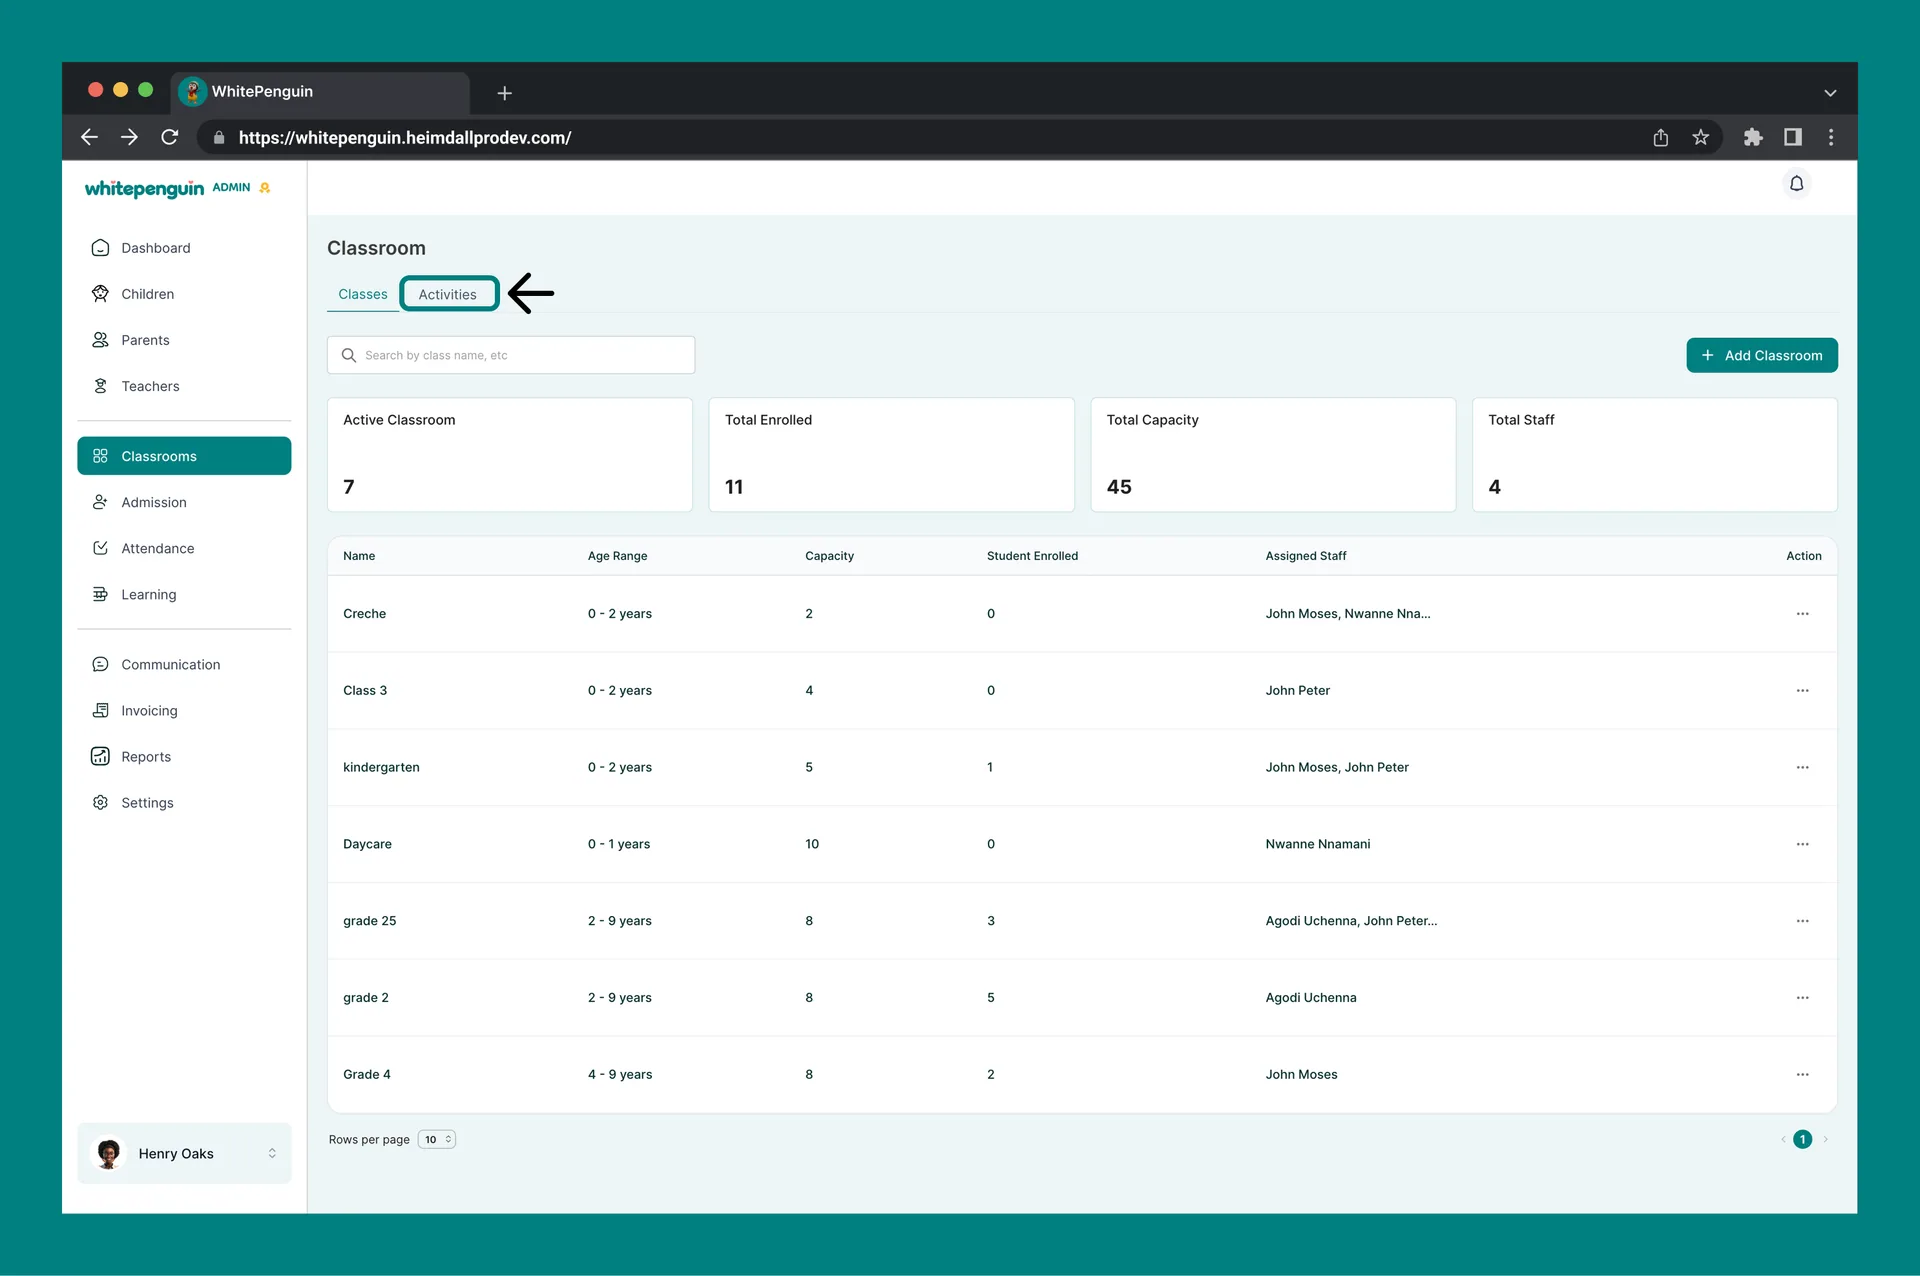
- Open the Activities tab.
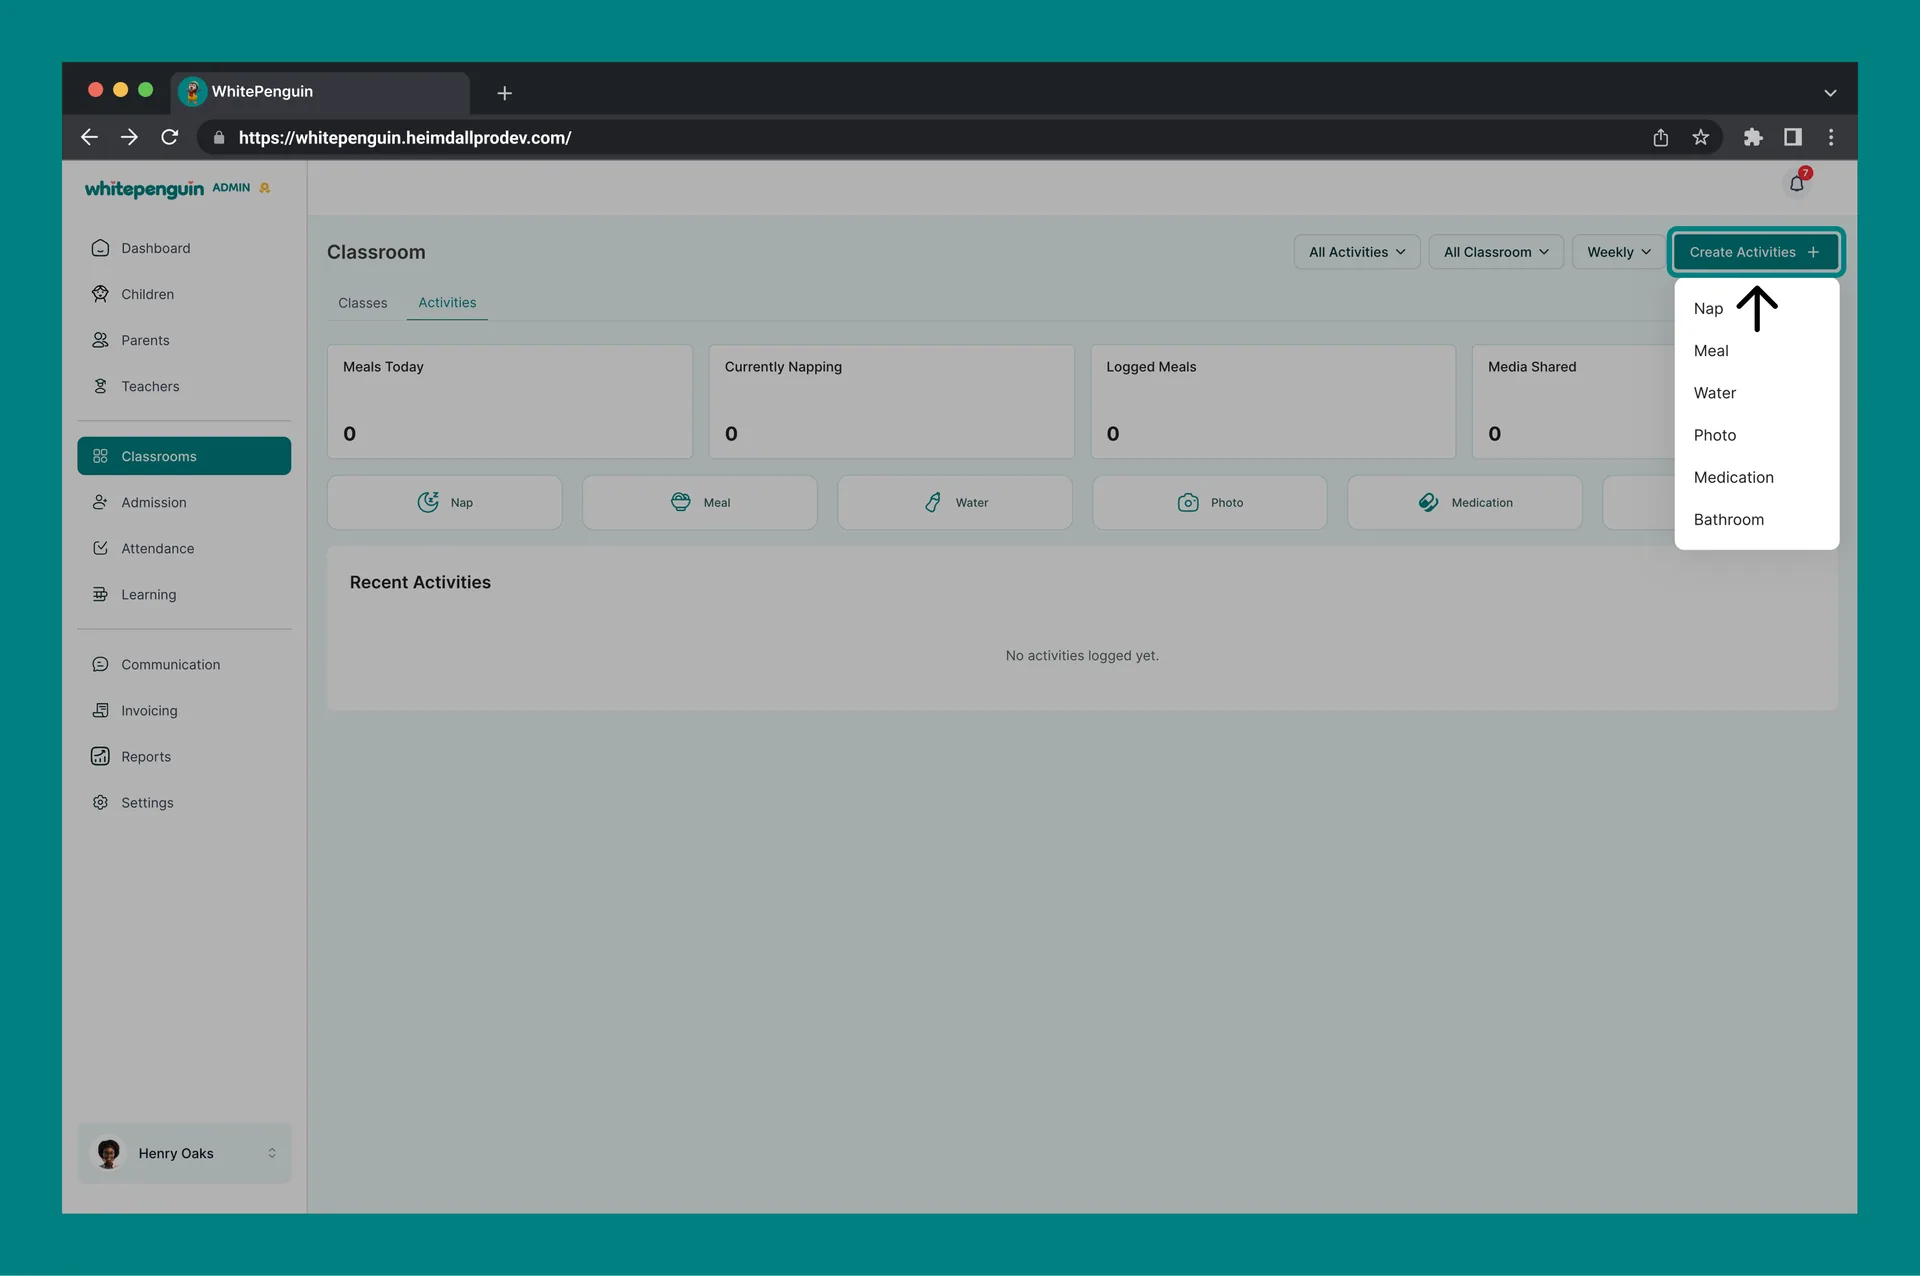
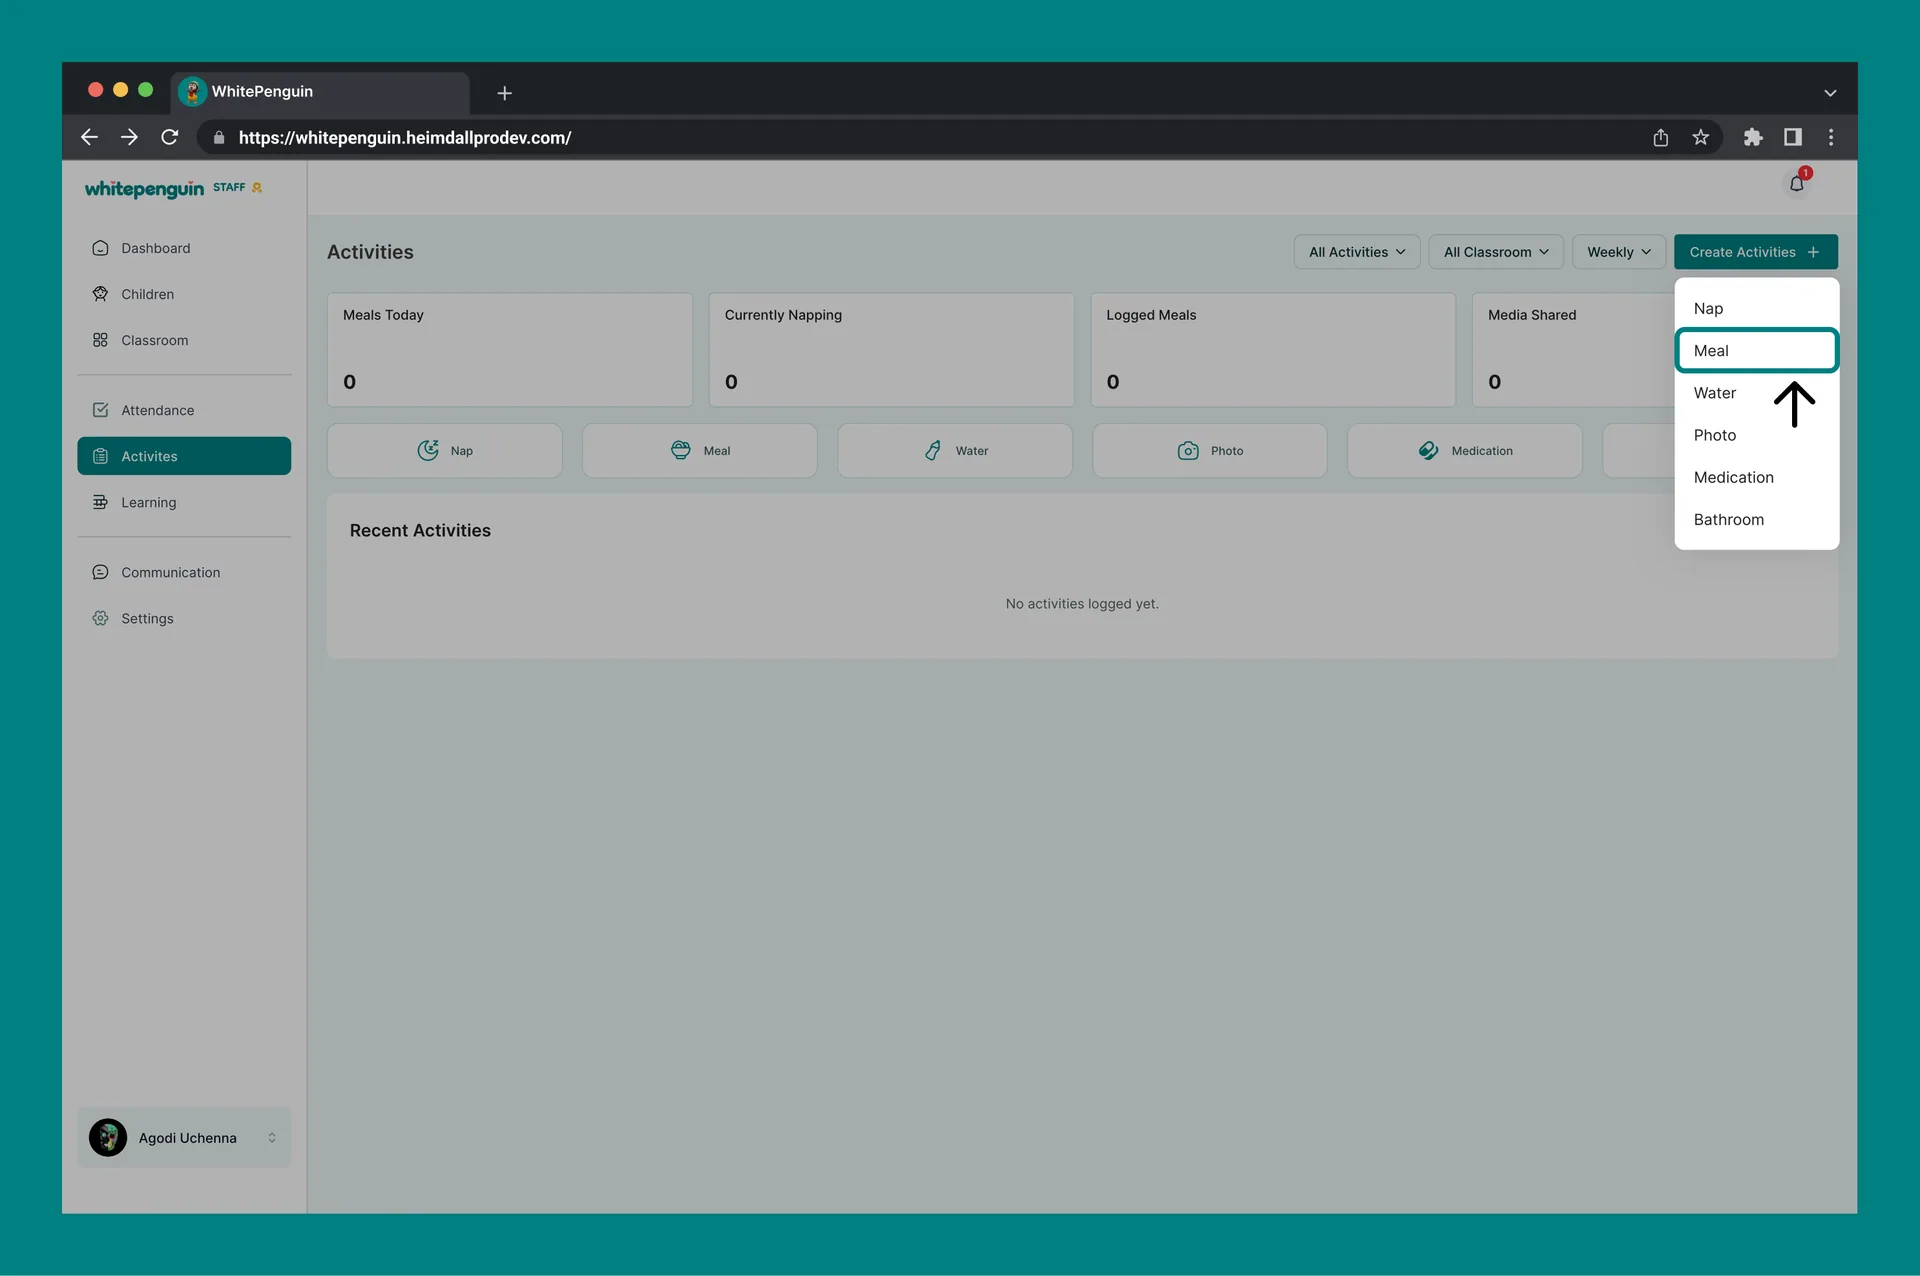
- Click Create Activities (top right), then choose Meal.
-
Staff
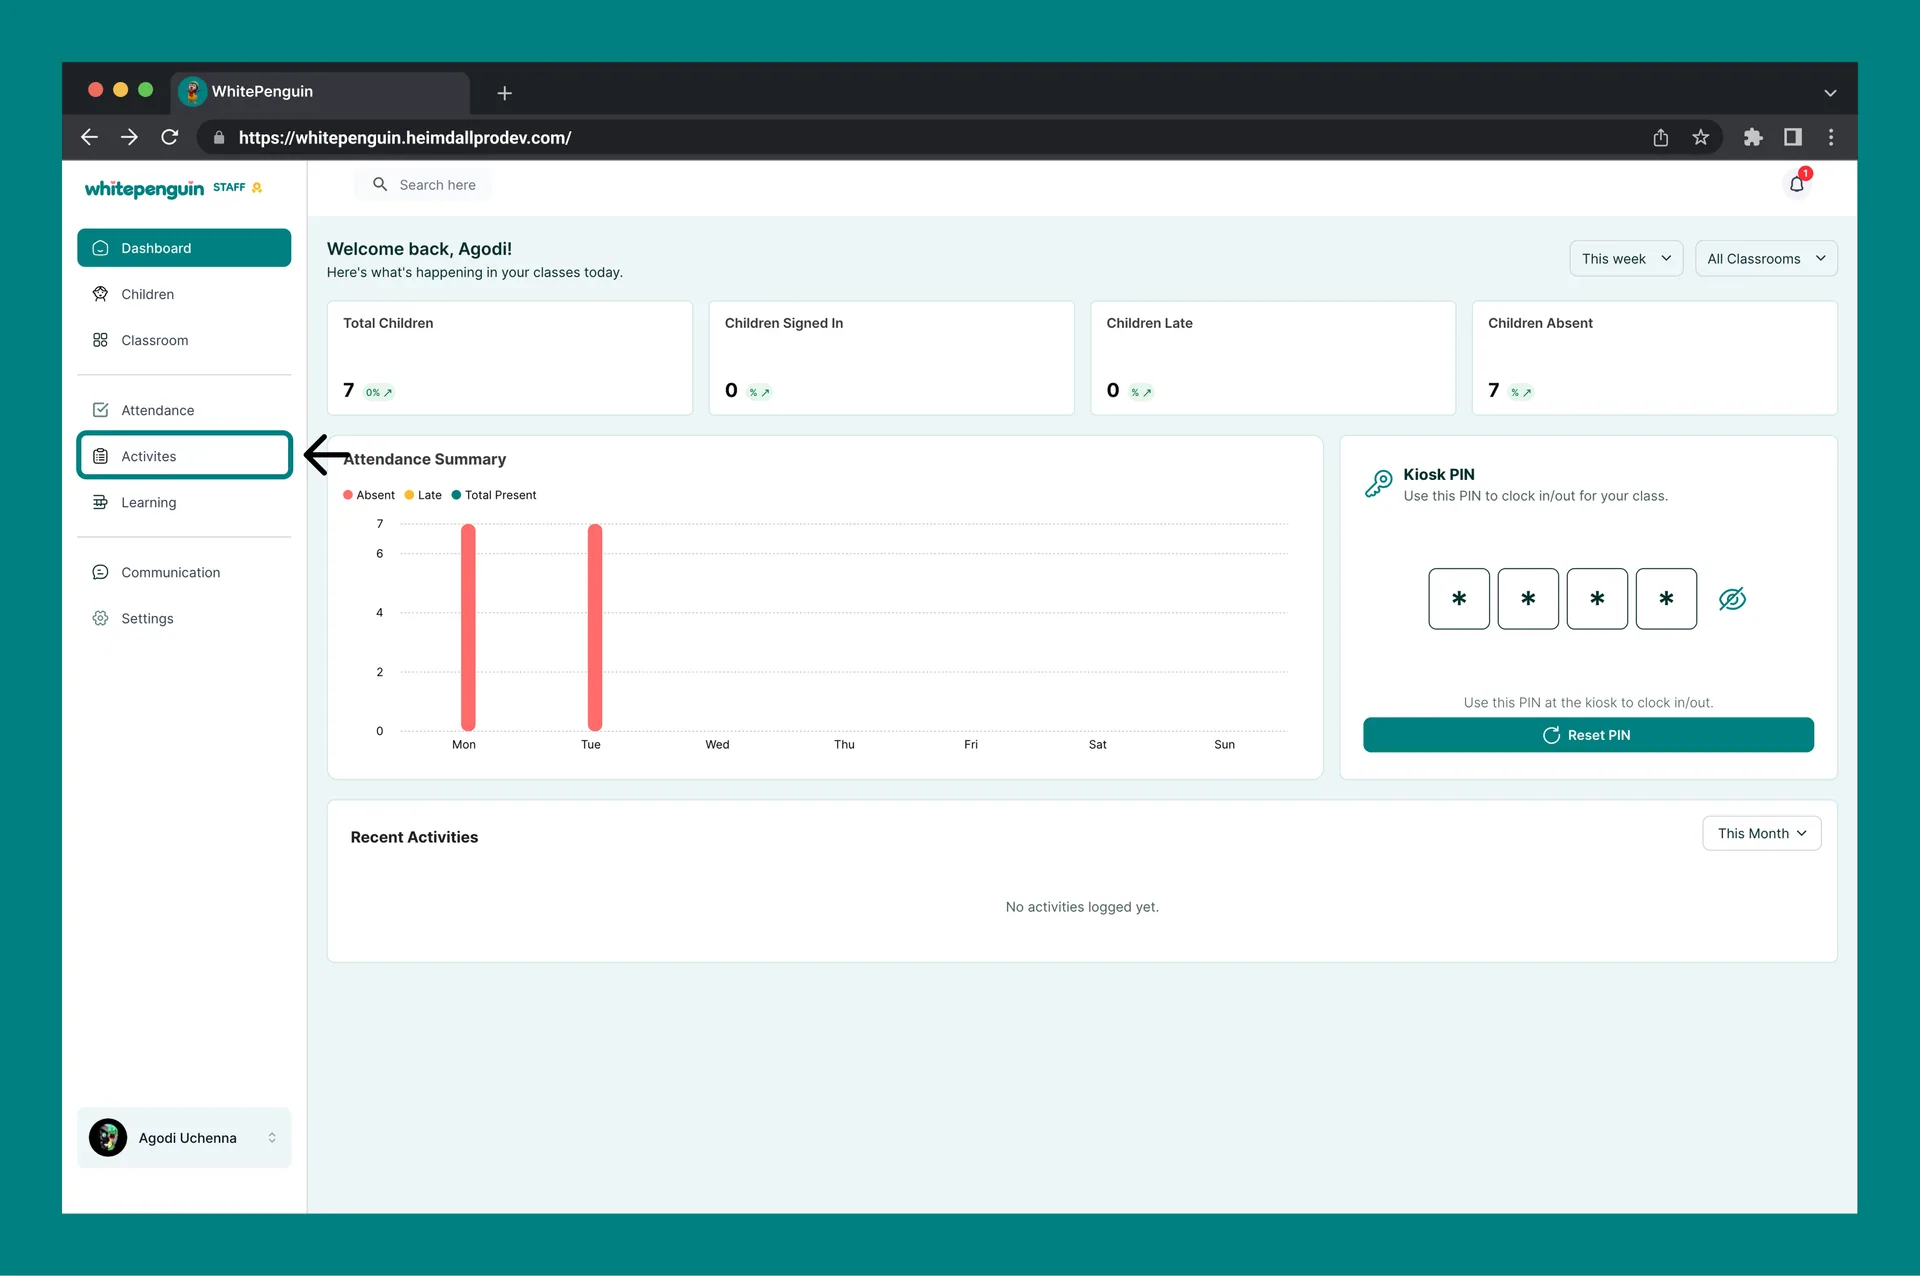
- Click Activities in the left sidebar.
- Click Create Activities, then choose Meal.
Roles & Access
Access is based on custom roles. Your school admin creates custom roles for all users and controls exactly which permissions each role has — View, Edit, Create, and Delete — for every section of the system, including Activities.
Whether you can log meals depends entirely on the custom role assigned to you:
- Roles with Create permission for Activities can log meal entries.
- Roles with View permission can see the Activities feed and meal history.
- Classroom and child visibility follows the role's permissions and the user's classroom assignments.
Where to manage roles: Go to Settings → Roles & Permissions, then click + Create Role to build a new custom role, or select an existing role to toggle its permissions. Super Admin permissions are fixed and cannot be edited.
How to log a meal
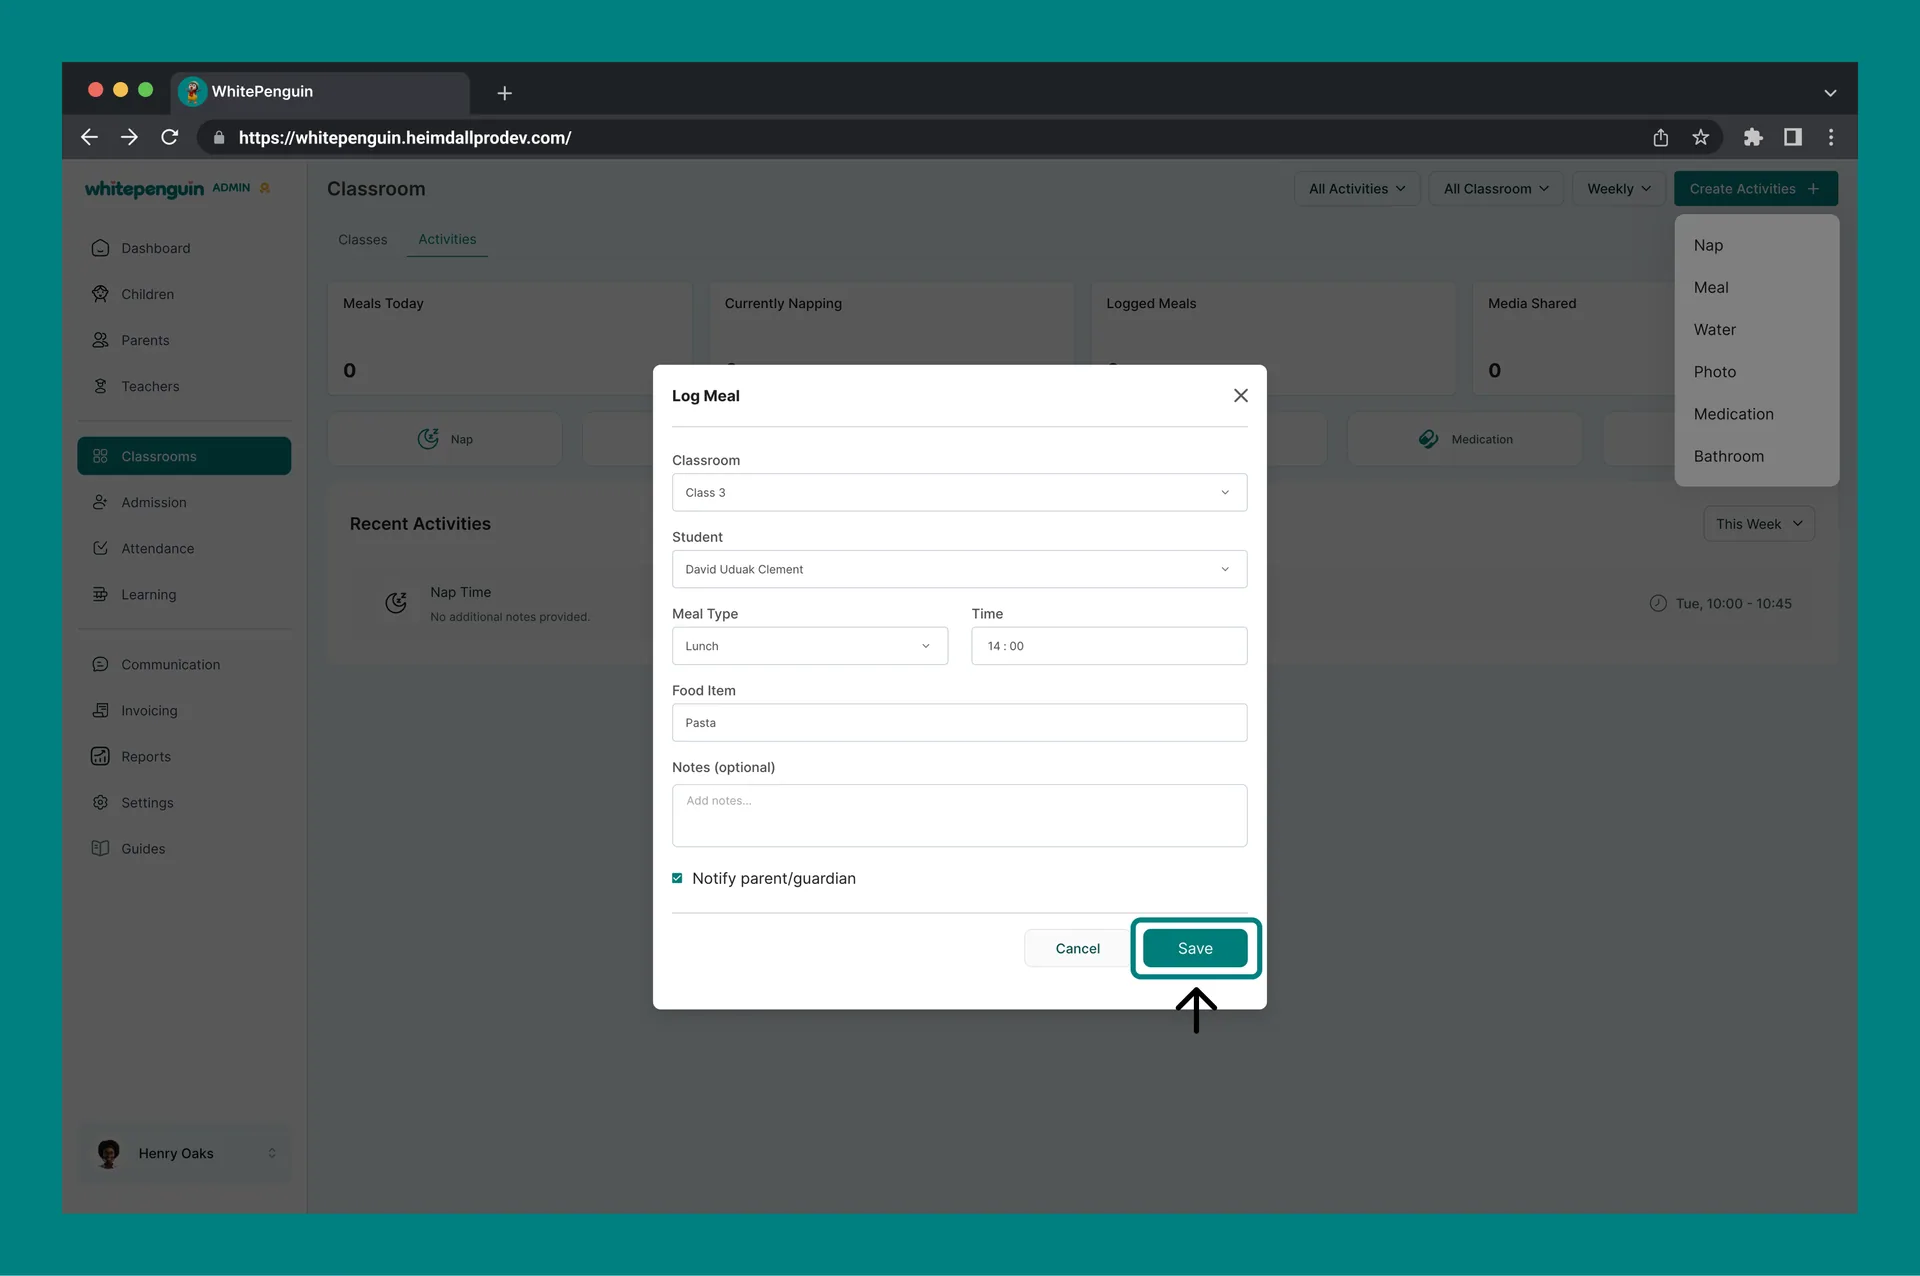
When the Log Meal window opens:
-
Classroom
- Select the classroom.
- Admins: can choose from all available classrooms.
- Other roles typically see only their assigned classroom (or assigned children).
-
Student
- Select the child.
- If the list is empty, select a classroom first.
-
Meal Type
- Choose the meal type (for example: breakfast, lunch, or dinner).
-
Time
- Enter the time the meal was given.
-
Food Item
- Enter what the child ate (for example: “pasta”, “fruit”, or “sandwich”).
-
Notes (optional)
- Add any details you want to keep on record.
-
Notify parent/guardian (optional)
- Turn this on if you want the parent/guardian to be notified.
-
Click Save.
Tips
- Use the same naming style for Food Item across your team (it makes activity history easier to scan).
- If you don’t see the right classroom, ask an admin to confirm your classroom assignment.
FAQs
Classroom visibility depends on your custom role and classroom assignments. Roles with full Classroom access see every classroom; others only see the classrooms (and children) they're assigned to.
Your custom role may not include Create permission for Activities. Ask your school admin to update your role in Settings → Roles & Permissions.
Select a Classroom first. If it's still empty, the child may not be assigned to that classroom — or your custom role may not have access to it.
Parents/guardians receive a notification based on your school’s notification settings.
Last updated on